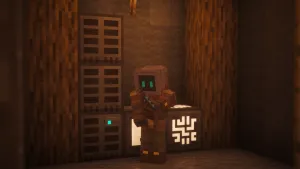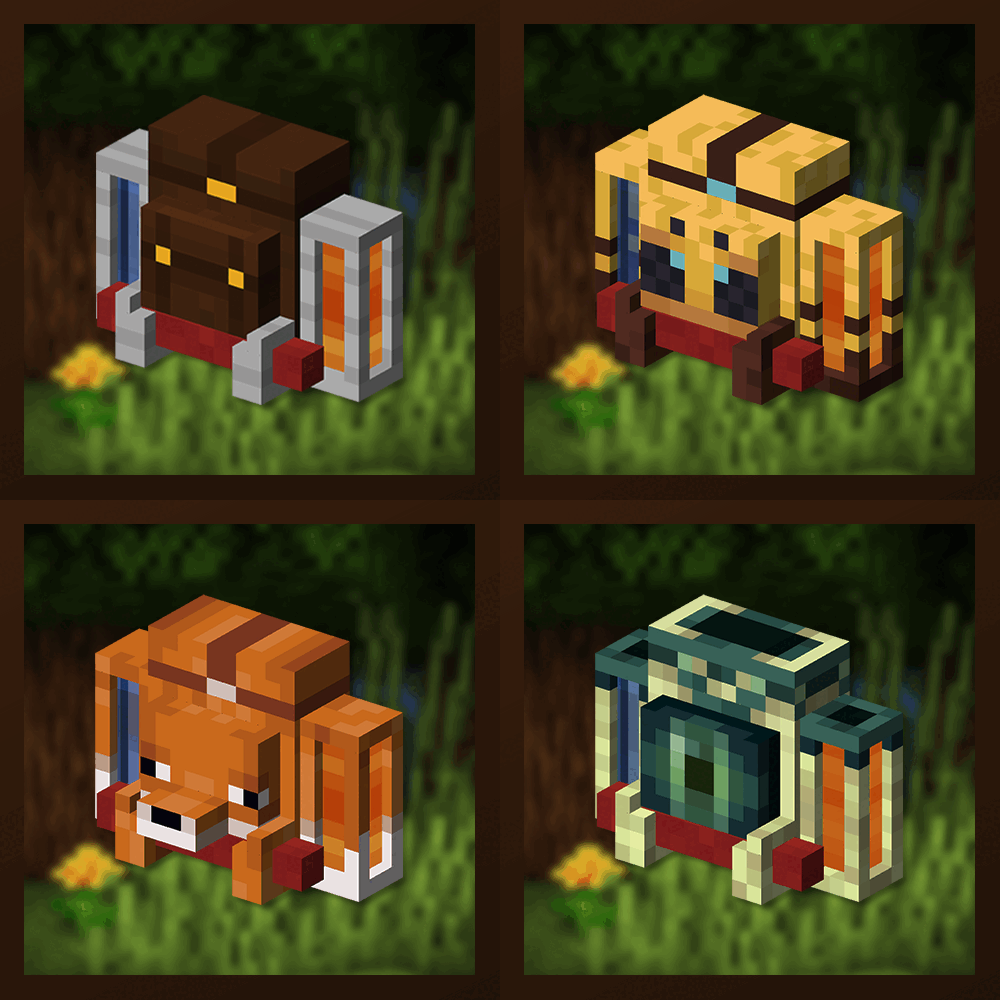
Traveler’s Backpack transforms how you manage inventory on long expeditions. Rather than sprinting back to base every time your pockets overflow, you carry a fully customizable pack that grows with you from a simple leather sack to a netherite powerhouse. The mod adds more than 40 unique backpack designs, a fluid transport system, a full suite of functional upgrades, and special backpacks with permanent passive abilities that change how you explore, fight, and survive.
Other Mods You May Like

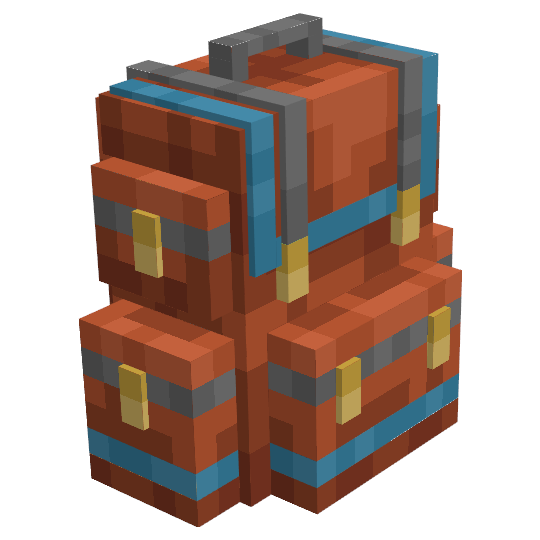




Getting Started with Traveler’s Backpack
Your first backpack requires a few new materials before you can craft it. The mod introduces three items you will not find elsewhere: the Sleeping Bag, the Backpack Tank, and the Hose Nozzle. Getting started feels rewarding quickly because the materials are all accessible in early survival without requiring a trip to the Nether or special structures.
Craft a Sleeping Bag
Place three wool in a horizontal row to craft one Sleeping Bag. Any color works, and you can dye it later. The Sleeping Bag lets you skip nights without placing a bed and, importantly, does not set your spawn point, so it is purely a convenience tool while traveling.
The Sleeping Bag comes in all 16 Minecraft dye colors. Craft a white one first using three white wool, then dye it at a crafting table if you want a different color.

Keeping one stocked in your backpack gives you night-skipping access anywhere in the world without committing to a new spawn location.


Craft Backpack Tanks
Place 6 glass blocks and 2 iron ingots in a pattern with iron on the sides and glass filling the rest to craft one Backpack Tank. You need two for the basic backpack recipe.
Backpack Tanks provide your backpack with its fluid storage capacity. The recipe uses glass on the four corners and four sides with iron ingots on the left and right of the middle row. Craft at least two before moving on.

Tanks are also available as a standalone Tanks Upgrade later, which adds two additional tanks to an existing backpack. It is worth keeping extra glass and iron handy for this reason.


Craft Your First Traveler's Backpack
Combine 4 leather, 1 string, 2 Backpack Tanks, 1 wooden chest, and 1 Sleeping Bag in the standard crafting shape to produce your first Leather Tier backpack.
The crafting layout places leather in the four corner slots, string in the top center, a Backpack Tank on each side of the middle row, a wooden chest in the center, and the Sleeping Bag in the bottom center.

The resulting Leather Tier backpack has 27 inventory slots, 2 tool slots, 2 upgrade slots, and two built-in fluid tanks. First-time players often find the Leather Tier feels cramped, and that is intentional: upgrading to Iron or beyond transforms the pack into a genuinely useful companion.


Equip and Access Your Backpack
Right-click the backpack while holding it, then click the Equip button to put it on. Press B (default) to open it from your back slot.
Once equipped, the backpack renders visually on your character’s back and stays there through all activities. Press B to open the inventory from anywhere, without first placing the backpack. To deploy the Sleeping Bag from inside the GUI, click the sleeping bag icon.

The backpack also supports a Curios/Accessories back slot integration if those mods are installed, letting you equip it without taking up a hotbar slot.
The B key for opening your backpack frequently conflicts with other mods. If pressing B does nothing or triggers an unrelated action, open your Minecraft keybind settings and rebind it under the Traveler’s Backpack category. Players consistently report this as the first frustration when installing the mod.
Understanding the Traveler’s Backpack Interface
The backpack GUI packs a lot of functionality into one screen. Beyond the main inventory grid, there are dedicated sections for tools, fluid tanks, upgrade slots, and a settings panel that gives you precise control over sorting and slot behavior. New players often miss several of these features entirely on their first run.
Tool Slots
Tool slots appear on the left side of the GUI and accept tools, weapons, and, with a config toggle, any item. The Leather Tier provides 2 tool slots, scaling up to 6 at the Netherite Tier. While wearing the backpack, hold Z and scroll the mouse wheel to open a quick-swap radial menu and cycle through your stored tools, replacing whatever is in your main hand.

A small overlay on the screen displays your current tool belt, so you always know what is accessible without opening the GUI.
Fluid Tanks
The two built-in tanks sit in the lower section of the GUI, shown as visual containers with the current fluid displayed. You can manually insert fluids by placing a filled bucket or potion bottle in the input slot; the fluid transfers into the tank automatically. Place an empty bucket or bottle to pull fluid out.

Press N to toggle which tank the Hose is currently targeting. You cannot mix different fluids in the same tank, but each tank can hold a different fluid simultaneously.
The Fluid System: Tanks and the Hose
The Hose is Traveler’s Backpack’s most distinctive item. It transforms your fluid tanks from simple containers into an active collection and deployment tool, letting you gather water or lava directly from the world, spill fluids where needed, or drink from your tanks for unique effects.
Crafting the Hose
The Hose Nozzle is the first component: place 1 gold ingot in the top center and 2 iron ingots on either side of the middle row to craft it.
Combine 1 Hose Nozzle with 4 green dye in an L-shaped crafting pattern to produce the finished Hose. You must have the backpack equipped before the Hose will function.


Hold Z and scroll while holding the Hose to switch modes or toggle between tanks.
Hose Modes
Suck Mode draws fluid from any source block in the world directly into the active tank. Point at water, lava, or a milk cow and right-click to fill the tank. Spill Mode releases the tank’s contents into the world, effectively placing the fluid as a source block.

Drink Mode consumes fluid from the tank and applies its effect to the player. Switching modes requires holding Z and scrolling; this keybind can be rebound in Minecraft’s controls menu under the Traveler’s Backpack category.
Fluid Drinking Effects
Drinking different fluids in Drink Mode produces distinct effects, and not all of them are beneficial. In hot biomes like deserts and badlands, drinking water grants Regeneration 1 for 7 seconds and extinguishes fire, making it a reliable emergency heal. Drinking milk works identically to consuming a milk bucket, instantly removing all active status effects including poisons and curses.

Drinking lava is a calculated risk. It sets you on fire for 15 seconds, but simultaneously grants Speed 3, Jump Boost 1, and Mining Fatigue 4 for 60 seconds. Without Fire Resistance, the fire damage outweighs the benefits, but players who have Fire Resistance active can use it for a dramatic burst of mobility.
Drinking a potion from a tank filled with it applies the full potion effect exactly as if you had consumed the bottle directly.
Traveler’s Backpack Keybinds and Controls
All keybinds are configurable under the Traveler’s Backpack category in Minecraft’s Options menu. The mod also supports independent toggle keys for each of the four upgrade slots (labeled Toggle Upgrade 1 through 4), letting you enable or disable specific upgrades without opening the GUI. This is particularly useful for toggling the Pickup or Magnet Upgrade on the fly when switching between farming and combat.
Tier Upgrades: Expanding Your Backpack
The standard backpack starts at Leather Tier and can be upgraded all the way to Netherite. Each tier dramatically increases storage, tool slots, and upgrade capacity. Upgrades must be applied sequentially, meaning you cannot jump from Leather directly to Diamond: you must go Leather to Iron, Iron to Gold, Gold to Diamond, and finally Diamond to Netherite.
Leather
Iron
Gold
Diamond
Netherite
Crafting Tier Upgrades
All tier upgrades start with the Blank Upgrade. Craft it by placing 1 leather in the center and 4 string in a cross pattern at a crafting table, yielding 4 Blank Upgrades per craft. The Blank Upgrade is the base ingredient for every functional upgrade as well, so always keep several in stock.
 4
4


To make the Iron Tier Upgrade, surround a Blank Upgrade with 8 iron ingots at a crafting table. The Gold and Diamond upgrades follow the same surrounding pattern with their respective materials.


To apply a tier upgrade, open a Smithing Table and place leather in the template slot, the tier upgrade in the addition slot, and your current backpack in the base slot. The result is the next-tier backpack with all stored items, fluids, and upgrades preserved. The Netherite Tier Upgrade is crafted differently: use a Netherite Upgrade Smithing Template with a Blank Upgrade and a Netherite Ingot at the Smithing Table to make the upgrade item first, then apply it to your Diamond Tier backpack.
Shift-clicking a placed backpack with a Blank Upgrade in hand resets it to Leather Tier, drops all upgrades and items on the ground, and drains excess fluid. This is intentional for resetting a pack, but doing it accidentally is disastrous. Keep Blank Upgrades in a separate chest or in a clearly labeled slot away from tools you use while crouching.
Functional Upgrades Guide
Beyond tier upgrades, Traveler’s Backpack has a full suite of functional upgrades that slot into the upgrade slots on the right side of the backpack GUI. Higher-tier backpacks have more upgrade slots, so part of the progression is choosing which upgrades matter most to your playstyle.

Each upgrade is crafted by combining a Blank Upgrade with the relevant item and a wooden chest and can be directly accessed without placing down the usual blocks, making for a more portable traveler.
Crafting, Smelting, and Cooking Upgrades
The Crafting Upgrade adds a full 3×3 crafting grid accessible from a tab in the backpack GUI, letting you craft items without placing a crafting table. Combine a crafting table, a Blank Upgrade, and a wooden chest vertically in a crafting grid to make it. The Furnace Upgrade embeds a functional furnace in the backpack, which players consistently find indispensable for smelting ore on the move.


The Smoker Upgrade and Blast Furnace Upgrade work identically to their vanilla counterparts but process food and ores faster, respectively. All three smelting upgrades are crafted by replacing the crafting table in the recipe with a furnace, smoker, or blast furnace.
Storage and Automation Upgrades
The Tanks Upgrade adds much higher-capacity tanks to the backpack, raising the total to 18,000 unit tanks for players who need to carry large amounts of fluids simultaneously.
The Pickup Upgrade makes the backpack act like a magnet for specific items: configure an allow or block filter to control which item types are automatically collected from the ground. The Magnet Upgrade pulls items toward the player within a configurable radius of 5 blocks by default, drawing them into the backpack without requiring the Pickup Upgrade to be active.




The Refill Upgrade monitors your inventory for selected item types and automatically restocks them from the backpack when your supply runs low. This means you never realize mid-fight that you have run out of arrows or torches. The Feeding Upgrade functions similarly but for food: configure which foods the backpack should automatically eat and at what hunger threshold.




The Void Upgrade provides a trash bin within the GUI and lets you set filters to automatically discard unwanted items that enter via hoppers or the Pickup Upgrade.
Jukebox Upgrade
The Jukebox Upgrade embeds a music disc player directly in the backpack. Insert a disc from the upgrade tab, and music plays while you explore, without placing a jukebox block.


It is a purely cosmetic quality-of-life addition, but it makes long overworld journeys considerably more enjoyable.
Special Backpacks: All Types and Abilities
Beyond the standard progression backpack, Traveler’s Backpack adds more than 40 special variants, each themed around a Minecraft material or mob. Most have passive abilities that activate while the backpack is equipped, and some are purely cosmetic.


A handful cannot be crafted and must be found in the world or obtained through trading. All special backpacks share the same inventory size as the Standard Traveler’s Backpack and can be upgraded in tier separately.
Material Backpacks
Several special backpacks use mineral and material themes, providing armor bonuses or unique utility abilities when worn or placed.
Iron
Gold
Diamond
Netherite
Emerald
Bookshelf
Redstone
Lapis
Quartz
Nature and Food Backpacks
These backpacks interact with water, food, and farming mechanics, providing passive resource generation and crop bonuses.
Sponge
Cactus
Cake
Melon
Hay
Hostile Mob Backpacks
Hostile mob backpacks provide powerful defensive and offensive abilities themed around dangerous Minecraft creatures.
Pumpkin
Creeper
Blaze
Ghast
Magma Cube
Enderman
Spider
Wither
Dragon
Warden
Passive Mob Backpacks
Passive mob backpacks range from powerful utility effects to purely cosmetic options. Several can only be found as loot or purchased from villagers.
Bat
Bee
Ocelot
Squid
Cow
Fox
Chicken
The Wolf, Horse, Pig, Sheep, Skeleton, and Coal Backpacks are purely cosmetic, providing no ability. The Villager Backpack can only be purchased from a Librarian villager at Journeyman level or above, while the Iron Golem Backpack has a 10% chance to appear in Armorer villager house chests — both are decorative only.
Finding Traveler’s Backpacks in the World
Traveler’s Backpack adds backpacks to several world-generation loot sources and also causes mobs to occasionally spawn wearing them. These world-found backpacks provide a way to skip some of the crafting grind or obtain designs that cannot be crafted at all.
Mob Drops
In the Overworld, Zombies, Skeletons, and Endermen have a 0.5% chance to spawn wearing a random backpack from the Overworld pool. In the Nether, Wither Skeletons and Piglins have the same chance to spawn wearing a nether-appropriate backpack. Killing one of these mobs causes the backpack to drop as a lootable item, complete with whatever was inside it.
Endermen are a particularly worthwhile target because killing one wearing the Enderman Backpack gives you the reach-extending ability without any material cost.
Loot Chests and Trades
The Bat Traveler’s Backpack appears exclusively in Abandoned Mineshaft and Dungeon chests with a 5% chance per chest. The Villager Traveler’s Backpack is purchasable from Journeyman-level Librarian villagers. The Iron Golem Traveler’s Backpack has a 10% chance to appear in Armorer villager house chests.
The mod also adds tier upgrades and standard backpacks to general loot table pools across various dungeon types, so exploring early-game structures can give you a head start on upgrades.
Death Recovery
When you die while wearing a backpack, it drops at the location of your death rather than being destroyed. By default, the backpack is also invulnerable to fire, lava, and void damage, so it will not burn away before you can retrieve it. A coordinate message tells you exactly where the backpack landed.
If the backpack is somehow lost, the game saves backup data inside the world folder and a recovery command exists to restore it.
Tips for Success
Upgrade your tier as soon as you hit Iron. The Leather Tier’s 27 slots and 2 upgrade slots feel restrictive almost immediately, and the Iron Tier at 45 slots with 3 upgrade slots opens up the Crafting and Furnace upgrades simultaneously. Many players who quit the mod early did so because they stayed at Leather Tier too long and underestimated how much the upgrades improve the experience.
Use the Memory Slot system for consumables. Assigning memory slots to potions, food, or arrows ensures those items always return to the same position after Quick Stack or Transfer operations. Combined with the Refill Upgrade, you can set it up so arrows or healing potions automatically move from the backpack to your inventory whenever you use the last one, without any manual intervention.
The Bat Backpack transforms caving more than almost any other item in the mod. When community players discussed their favorite setup, Night Vision from the Bat Backpack came up repeatedly as the single change that made underground exploration feel completely different. Pair it with the Magnet Upgrade and Pickup Upgrade configured to collect ore drops, and you have an extremely efficient mining build that requires almost no hotbar management.
Carry a second backpack for specialized tasks. You can store additional backpacks in your inventory and swap between them. Many experienced players keep a combat backpack (Dragon or Creeper for abilities) equipped during fights and a utility backpack (with Furnace and Crafting upgrades) ready to swap in when exploring.
The quick equip and unequip system makes switching mid-adventure fast enough to be practical.
The Hopper automation integration is excellent for base storage. Place a hopper on top of a placed Traveler’s Backpack to insert items and at the bottom to extract them. This makes the placed backpack function as a buffer between your mining return trips and your storage system.
Some players use them as portable sorting stations that double as display pieces on base walls.
Frequently Asked Questions
No. The Sleeping Bag skips the night and suppresses phantom spawning timers, but it does not set your respawn point. It is purely a travel convenience and does not replace a bed. If you want a fixed spawn point, you still need to sleep in a regular bed.
No. Tier upgrades must be applied in order: Leather to Iron, Iron to Gold, Gold to Diamond, and Diamond to Netherite. Attempting to apply a higher-tier upgrade to a lower-tier backpack will not work. Plan your material gathering accordingly so you are not waiting on iron ingots after already having gold and diamonds on hand.
The backpack drops as a block at your death location and is immune to fire, lava, and void by default. You receive a chat message with the exact coordinates, and your items remain inside when you retrieve it. The game saves a backup file in the world folder, and a recovery command can restore a completely lost backpack.
The Hose only functions when a Traveler’s Backpack is equipped on your back, not when it is held in your hand or sitting in inventory. Equip the backpack first using the Equip button in the GUI, then use the Hose. Also confirm you are in Suck Mode for collecting fluids: hold Z and scroll to switch modes.
No. Backpacks cannot be placed inside other backpacks by default, and the same restriction applies to shulker boxes unless changed in the server config. You can carry additional backpacks as standalone items in your regular inventory and swap the equipped one manually when needed.
Place the special backpack on the ground, then Shift-right-click it with Shears in hand. This converts it back to a Standard Traveler’s Backpack, preserving the inventory contents. This is useful when you have found a better special backpack and want to repurpose your current one as a storage-only pack.