

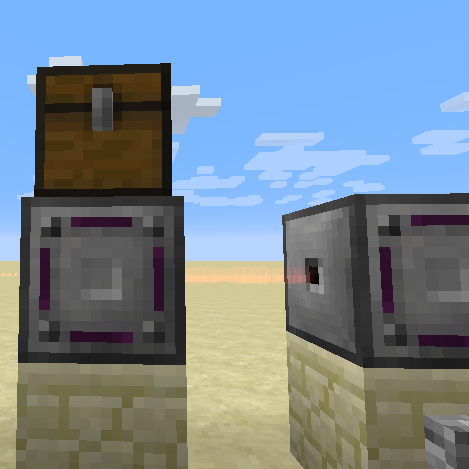
Modular Routers is a Minecraft mod that gives you a single block, the  Modular Router, which you can turn into almost any kind of item mover with Modules and Upgrades. On its own a Router doesn’t do anything, it’s just a block with one slot in it, but every Module you add gives it a new job, like pulling from a
  Chest or sending items somewhere else.

It’s one of those mods that shows up in a lot of bigger modpacks, since it’s cheap to get going and it can replace a whole line of  Hoppers with one block. The flip side is that there’s quite a lot to learn, so this guide goes through how to set one up, what the main Modules do and which Upgrades are worth making.
Everything here is from the 1.20.1 Forge version of the mod, which is 12.1.1, and nothing else is needed to run it besides Forge itself. The 1.21.1 builds work the same way for the basics, but some numbers could be different there, so check the in-game tooltips if you’re playing a newer pack.
How to Use Modular Routers
The first thing to make is a  Blank Module, since nearly everything in the mod starts as one. It’s crafted from a
  Redstone Dust, three
  Paper and three
  Gold Nuggets, and one craft gives you six of them, which is enough to make a Router and a couple of Modules straight away.


 6
6The Modular Router itself is four  Iron Ingots, four
  Iron Bars and one Blank Module, and that recipe gives you four Routers at once. That’s a good deal, as you’ll usually want more than one of them once you see what they can do, so there’s no need to worry about using them up.


 4
4Right-click a placed Router to open it. There’s a single buffer slot in the middle, nine slots for Modules along the bottom and five slots for Upgrades on the side. Every item the Router moves has to go through that one buffer slot, so a Router can only really work with one type of item at a time, which is worth keeping in mind.
Modules decide what the Router actually does. A Puller Module takes items out of an inventory next to the Router, and a Sender Module puts items from the buffer into another inventory, so the simplest setup is just one of each. Directions on a Module are relative to the front of the Router, so Front, Back, Left, Right, Up and Down all depend on which way you placed it.
By default a Router runs once every second, and each time it runs it moves a single item. That’s actually slower than a Hopper, so don’t be put off if your first Router seems slow, because the Upgrades further down this guide are what make it fast. A fully upgraded Router ends up moving 64 items every 2 ticks, which is far past anything Hoppers can do.
A First Setup: Chest to Furnace
A good first build is a Router that takes ore out of a Chest and feeds it into a  Furnace. Place the Router with its back against the Chest and the Furnace on top of it, then put a
  Puller Module Mk1 set to Back and a
  Sender Module Mk1 set to Up into two of the Module slots.
The Puller takes one item from the Chest each time the Router runs, and the Sender pushes whatever is in the buffer into the Furnace. You can do the same thing the other way around to take the smelted items back out, with a second Router under the Furnace pulling from it and sending into another Chest.
To make the Puller Module Mk1 you just need a Blank Module and a  Sticky Piston, and the Puller Module Mk1 can only pull from the inventory that’s right next to the Router. The Sender Module Mk1 needs a Blank Module, a
  Bow and an Arrow, and the Sender can reach quite a bit further than that, which is covered in the next section.


If nothing happens when you set it up, the first thing to check is the direction on each Module, as that’s the mistake most people make. You can see the direction on the Module’s tooltip, and it’s always going off where the Router is facing, not north, south, east or west, so a Router placed the other way needs its Modules set the other way too.
Sender Modules
There are three tiers of Sender, and they’re all about how far the items can go. The Sender Module Mk1 shoots items in a straight line in the direction it’s set to, and it drops them into the first inventory it finds within 8 blocks. It stops at the first solid block that isn’t an inventory, so you can’t send through a wall with it.
The  Sender Module Mk2 is the Mk1 with an
  Ender Pearl added, and it doesn’t care about direction at all. You sneak and right-click an inventory with the Module in your hand to link it, and after that it sends straight there, as long as the target is within 24 blocks and in the same dimension as the Router.

The  Sender Module Mk3 is the Mk2 with an
  End Stone and an
  Ender Chest, and it has no range limit, so it’ll send to the linked inventory from anywhere, even from another dimension. That makes it the one to use for sending items from a Nether base or a mining outpost straight back to your storage.




The  Distributor Module is related to these. It’s a Blank Module with three Sender Mk2s, and it can be linked to up to eight inventories, which it then fills in turn. You can set it to Round Robin, Random, Nearest First or Furthest First, so it’s the easiest way to spread items like fuel across a row of Furnaces.
Filters
Every Module has its own filter, which is the row of nine slots you see when you right-click the Module in your hand. The thing that catches people out is that a fresh Module is set to Blacklist with nothing in it, which means it matches everything, so a Sender with an empty filter will send every item that ends up in the buffer.
To make a Module only handle certain items, put those items into its filter slots and switch it from Blacklist to Whitelist. There are also three toggles for Ignore Damage, Ignore NBT and Ignore Tags. Ignore NBT and Ignore Tags are on by default, so enchanted or renamed items still match, but Ignore Damage is off, so a damaged tool won’t match a fresh one.
When nine slots isn’t enough, you can put a smart filter into one of the filter slots instead. The most useful is the  Bulk Item Filter, which holds up to 54 different items and can be filled straight from a Chest by sneaking and right-clicking it on the Chest, which is handy for sorting setups.


The  Mod Filter and
  Tag Filter are the ones that save the most time in modpacks. A Mod Filter set to a single mod will catch every block and item from it, and a Tag Filter lets you send all ores or all logs with one entry, instead of listing every type separately.
| Filter | What it matches | Entries |
|---|---|---|
| Module filter slots | The items you put in them | 9 |
| Bulk Item Filter | Any of the items stored in it | 54 |
| Tag Filter | Items with a given item tag, like ores or logs | 6 |
| Mod Filter | Everything from a given mod | 6 |
| Regex Filter | Items whose name matches a pattern | 6 |
| Inspection Filter | Items by a property, like durability or enchantments | 6 |
A smart filter goes into one of the Module’s normal filter slots, just like an item would, so you can mix them with ordinary items in the same filter. The Blacklist or Whitelist setting still covers the whole thing, which means a Blacklist with a Mod Filter in it sends everything except that mod’s items.
Vacuum, Void and Dropper Modules
The  Vacuum Module picks up item drops lying on the ground around the Router and puts them into the buffer. It’s a Blank Module, a Hopper and an
  Eye of Ender, and it reaches 6 blocks out by default, so it’s what most people use under a mob farm or next to anything that drops items.

Adding an  XP Vacuum Augment to it makes it collect experience orbs as well. By default it turns the experience into
  Bottle o’ Enchantings, one for every 7 experience, but it can fill a tank with liquid experience from mods like PneumaticCraft or Industrial Foregoing instead if you set it to that. The XP Vacuum Augment is just an
  Augment Core and
  Soul Sand.


The  Void Module deletes items from the buffer, so it’s what you put at the end of a line to get rid of things you don’t want, like Cobblestone or Rotten Flesh from a farm. Give it a whitelist so it only destroys what you meant it to, because an empty filter will void everything that reaches it.
The  Dropper Module drops items out of the Router onto the ground in the direction it’s set to, and the
  Flinger Module throws them instead, with a speed and angle you can set, so you can fire items a long way across a gap. Neither gets used as much as the others, but they’re there when you need items out in the world.
Breaker, Placer and Activator Modules
These three Modules let the Router work on the world instead of on inventories. The  Breaker Module is crafted from a Blank Module and any pickaxe that isn’t damaged, and it keeps that pickaxe inside it, so its enchantments carry over. A Breaker made with a Fortune pickaxe gets Fortune drops, and one made with Silk Touch mines blocks as themselves.
The pickaxe also decides what it can mine, so a Breaker made with an  Iron Pickaxe can’t break
  Obsidian, just like the pickaxe itself couldn’t. Use a
  Diamond Pickaxe or better if you want it to break everything, and remember the pickaxe isn’t used up or damaged by the Breaker, so it’s worth using a good one.
The  Placer Module places blocks from the buffer in front of it, and it’s made from a Blank Module, a
  Dispenser and some Dirt. Together with a Breaker it can make simple block generators, like a Cobblestone setup, or replant crops, which comes up in the farm section below.


The  Activator Module right-clicks for you, like a fake player. It uses whatever item is in the Router’s buffer, so if you put a Watering Can, some
  Bone Meal or a Bucket there, it’ll use that item on the block in front of it. With an empty buffer it acts like an empty hand, which is enough for Levers, buttons and some machines.
It has other modes too, for using the held item on a mob or attacking mobs. Attacking costs 150 FE of energy each time, so a Router doing that needs an  Energy Upgrade and a power supply, but every other Module in the mod runs for free by default.
Activator Module Not Working
The most common reason an Activator Module doesn’t do anything is that it’s pointed at the wrong block. It only works on the block directly next to the Router in the direction it’s set to, it has no range at all, so it needs to be touching whatever you want clicked, including the Farmland under a crop if you’re watering.
The second reason is the look direction. Some blocks need to be clicked on the top or the bottom face, and the Activator has a Level, Above and Below setting for that. If you’re trying to use a Bucket or a Watering Can on the ground, try setting it to Below, since the default Level mode clicks straight ahead.
It’s also worth checking the Router’s redstone mode, and whether the item is actually in the buffer. If something else in the same Router is pulling items in or sending them out, the buffer might be empty on the tick the Activator runs, so for things like a Watering Can it’s easiest to give the Activator its own Router.
Mystical Agriculture Farms
Modular Routers is a popular way to automate Mystical Agriculture crops, and it’s because of how the Breaker Module filter works. By default the Breaker checks what a block would drop, and it only breaks the block if at least one of those drops passes its filter. So if you whitelist the Essence a crop gives, it won’t touch that crop until it’s fully grown.

There’s one catch, which is that only the drops matching the filter go into the Router. The seeds from the harvested crop don’t match, so they drop on the ground, which is where a Vacuum Module comes in. Put one in the same Router and it’ll collect the seeds back into the buffer, ready to be used again.
After that, a Placer Module with a whitelist for the seeds will put them back into the  Farmland, and a Sender can send the Essence off to a Chest. Put the Modules in the order Breaker, Vacuum, Placer, Sender, and give the Router a few Speed Upgrades, since crops don’t all ripen at once and it helps to check them more often.
The same idea works for vanilla crops. Whitelist  Wheat in the Breaker and it’ll only break Wheat that’s ready to harvest, since young Wheat only drops
  Wheat Seeds,, so the same Router setup works on a normal Wheat farm too.
Upgrades
Upgrades go into the five slots on the side of the Router, and they change the whole Router rather than just one Module. They’re all made from a  Blank Upgrade, which is four Paper, a
  Lapis Lazuli and three Gold Nuggets, and one craft makes four of them.

 4
4The  Speed Upgrade is the one you’ll make the most. Each one takes 2 ticks off the time between the Router’s runs, so with nine of them in one slot it goes from once every second to once every 2 ticks, which is ten times a second. Nine is the most that does anything, and the slot won’t take more than that anyway.

The  Stack Upgrade changes how many items move each time. One Upgrade doubles it to two, and it keeps doubling for each one you add, so six Stack Upgrades move a full stack of 64 in one go. It’s made from a Blank Upgrade, Stone Bricks and a Brick, so it’s cheap enough to fill a slot early on.


 3
3


Between those two you’ve got what most busy Routers need, and the rest of the Upgrades are more about special cases. Here’s what each one does and how many of it can go in a single Upgrade slot, since some of them stack much higher than others.
| Upgrade | What it does | Max per slot |
|---|---|---|
| Speed Upgrade | 2 ticks faster per Upgrade, down to every 2 ticks | 9 |
| Stack Upgrade | Doubles items per run, up to 64 | 6 |
| Energy Upgrade | Adds 50,000 FE of storage and 1,000 FE/t transfer | 64 |
| Fluid Transfer Upgrade | Faster fluid transfer, 10 mB/t each | 35 |
| Muffler Upgrade | Quieter Router, with fewer particles | 3 |
| Camouflage Upgrade | Makes the Router look like another block | 1 |
| Blast Upgrade | Makes the Router explosion proof | 1 |
| Security Upgrade | Only you and players you add can open it | 1 |
| Sync Upgrade | Lets several Routers run on the same tick | 1 |
The  Camouflage Upgrade is nice for builds, since it lets the Router look like any block you set it to, so you can hide Routers inside walls. The
  Security Upgrade is worth having on a server, because without it anyone can open your Router and take the Modules out of it.
Augments and the Regulator Augment
Augments are like Upgrades, but they go inside a single Module instead of the whole Router, and they change just that Module. You add them by right-clicking the Module in your hand to open it, where there’s a small row of Augment slots. They all start as an Augment Core, which is just a Blank Module and a Blank Upgrade crafted together.
The  Regulator Augment is the one people ask about most. It sets a number, and when the Module is sending items, it only sends while the target inventory has fewer than that many of the item. When the Module is pulling, it only takes items while the source has more than that number, so the source always keeps some back.


That makes it perfect for keeping a machine topped up without flooding it, like keeping 16 Coal in every Furnace, or for leaving a stack of something in a Chest so you never run completely out. It’s made from an Augment Core, two  Redstone Comparators and two
  Nether Quartz, and each Module can only take one of them.
| Augment | What it does | Works in |
|---|---|---|
| Range Up Augment | Adds 1 block of range per Augment | Senders, Pullers, Vacuum, Extruders, Fluid Mk2 |
| Range Down Augment | Takes 1 block of range away | The same ranged Modules |
| Stack Augment | More items per run for just this Module | Most Modules, up to 6 |
| Regulator Augment | Keeps a set number of items in an inventory | Most Modules, 1 |
| XP Vacuum Augment | Collects experience orbs | Vacuum Module |
| Fast Pickup Augment | Grabs items as soon as they drop | Vacuum Module |
| Pickup Delay Augment | Stops dropped items being picked up for a while | Dropper Module |
| Pushing Augment | Pushes mobs and items along as it extrudes | Extruder Modules |
| Redstone Augment | Gives the Module its own redstone mode | Any Module |
The Range Augments only work on Modules that have a range. A Vacuum Module goes from 6 blocks up to 12 with enough Range Up Augments, and a Sender Mk2 goes from 24 up to 48, but they can’t go past those limits, so check the tooltip if an Augment won’t go in.
Extruder, Detector and Fluid Modules
The  Extruder Module Mk1 places blocks from the buffer in a line along its direction while the Router has a redstone signal, and it pulls them back in again when the signal goes away. People use it for hidden doors and bridges, and it’s made with a pickaxe like the Breaker, since it has to break the blocks to take them back.
The  Extruder Module Mk2 does the same thing without using the blocks from the buffer. You fill a small template inside it instead, so the Mk2 can make a bridge or a door out of any blocks you’ve set, and it reaches up to 32 blocks, while the Mk1 goes up to 16.
The  Detector Module gives out a redstone signal when a matching item is in the Router’s buffer, which is useful for lamps or alarms that tell you when something’s arrived. The
  Fluid Module Mk1 moves fluids between the Router and a tank next to it, using a fluid container like a Bucket in the buffer, and the
  Fluid Module Mk2 does the same at range, up to 12 blocks.
Redstone Modes and Module Order
Every Router has a redstone mode, set with the button in its screen. Always is the default and ignores redstone, High only runs while it’s powered, Low only runs while it isn’t, Never stops it completely, and Pulsed runs once every time it gets a new signal. Pulsed is useful when you want exactly one operation each time you press a button.
Modules run in the order they’re in the slots, left to right, and each one has a Termination setting. If a Module is set to stop after it runs, the Modules after it are skipped whenever it does something, which is a simple way to give one Module priority over another in the same Router.
There’s also an Eco mode in the Router screen. If the Router has had nothing to do for 5 seconds, Eco mode slows it down to running once every 5 seconds until it finds work again, which helps a lot on servers with a lot of Routers sitting idle.
Tips
Try to give each Router one job. A Router can hold nine Modules, but since items all pass through the single buffer slot, a Router doing too many things at once tends to get stuck with the wrong item in the buffer, and two or three simple Routers usually work better than one busy one.
Speed Upgrades are expensive because of the  Blaze Rod and
  Gold Ingot in them, so save them for the Routers that really need to be fast. A Router moving ore into a Furnace doesn’t need to run more than once a second, since the Furnace can’t smelt faster than that anyway.
If a Router stops working after you change something, check the Module filters before anything else. It’s easy to leave a Module on Blacklist with nothing in it and have it send everything, or switch one to Whitelist and forget to add the items, and then nothing moves at all.
FAQ
Craft a Modular Router and a few Modules, then place the Router and put the Modules into its Module slots. A Puller Module takes items from an inventory next to it and a Sender Module sends them somewhere else, and directions are relative to the front of the Router.
The Activator only works on the block directly next to the Router in the direction it’s set to, and it uses the item in the Router’s buffer. Check the direction, try the Below look setting for ground blocks, and make sure the item is actually in the buffer.
Yes, whitelist the crop’s Essence in a Breaker Module and it’ll only break fully grown crops. Add a Vacuum Module to pick up the seeds and a Placer Module to replant them, then a Sender to move the Essence into storage.
Without Upgrades it moves one item every second. With nine Speed Upgrades and six Stack Upgrades it moves 64 items every 2 ticks, which is much faster than Hoppers or most item pipes.


