


More Villagers is a Minecraft mod that adds eight new villager professions to the game, each one with its own workstation block and its own set of trades. You’ve got the Oceanographer, Netherologist, Forester, Enderologist, Engineer, Florist, Hunter and Miner, and they level up from Novice to Master just like a vanilla Librarian or Farmer does.

The reason people add it is the trades, since a lot of them sell things that are normally a pain to farm. You can buy a  Trident,
  Shulker Shells, a
  Ghast Tear, a
  Bee Nest and even a
  Dragon Head for Emeralds, and several of the new villagers sell Explorer Maps to structures that vanilla Cartographers never point you to.
It’s a small mod in terms of blocks, as there are only the eight workstations, but it changes how much you can get out of a trading hall. This guide goes through getting more villagers in the first place, every workstation recipe, all of the trades for each profession, and the one catch with the Nether and End maps that trips a lot of people up.
How to Get More Villagers
Before any of the new jobs matter you need spare villagers to give them to, and the easiest way is breeding. Two adult villagers will make a baby when there’s a free  Bed nearby that no villager has claimed yet, and both of them are willing, which means they’ve got enough food in their inventory to share.

To make villagers willing, throw them  Bread,
  Carrots,
  Potatoes or
  Beetroots. Each villager needs 3 Bread, or 12 of the crops, before it’ll breed, and a Farmer villager will happily share its own crops with the others if you give it a farm to work. Put a few extra Beds down and the village will keep growing on its own.
Curing Zombie Villagers is the other way, and it’s worth doing because a cured villager gives you a big discount on its trades. Hit the Zombie Villager with a Splash Potion of Weakness, then use a  Golden Apple on it, and it turns back into a normal villager after a few minutes as long as it stays out of sunlight.
Once you’ve got an unemployed villager, it’ll take any free workstation it can reach, and that includes the eight from More Villagers. An unemployed villager in plain clothes will walk to the nearest free workstation and claim it, but Nitwits in green coats never take a job at all. If a villager already has a job and you’ve never traded with it, you can break its block to reset it.
The Eight New Professions
Every profession in More Villagers is tied to a single workstation block, and the block is just a job site, so it doesn’t open a menu or do anything on its own. The table below lists each villager, the block that gives them their job, and the trade that makes them worth having.
| Villager | Workstation | Best Trade |
|---|---|---|
| Oceanographer | Oceanography Table | Trident for 32 Emeralds |
| Netherologist | Decayed Workbench | Fortress and Bastion Explorer Maps |
| Forester | Forestry Bench | Every Log and Sapling type |
| Enderologist | Purpur Altar | Shulker Shells and a Dragon Head |
| Engineer | Blueprint Table | Hoppers, Observers and Pistons |
| Florist | Gardening Table | Bee Nest for 6 Emeralds |
| Hunter | Hunting Post | Ghast Tear and Blaze Rod |
| Miner | Mining Bench | Ancient City Explorer Map |
Each level unlocks two trades, the same as vanilla, and the prices in this mod are fixed rather than random. That means the numbers in the trade tables below are what you’ll actually see, apart from the usual discounts from curing a villager or having Hero of the Village, and the price going up if you trade the same thing too often.

Two professions are a little different. The Forester has four possible trades at each of its first three levels, and a villager only ever rolls two of them, while the Engineer has three options at its second and third levels. So if you want a specific log type or redstone part, you might need to reroll a Forester or Engineer before you trade with it.
Oceanographer
The Oceanographer is the ocean trader, and the  Oceanography Table is the easiest workstation in the mod to make. It’s a shapeless recipe, so you just drop a
  Paper, a
  String and a
  Barrel anywhere in the crafting grid, and you’ll have one before you’ve even found an ocean.


Early on the Oceanographer buys Prismarine, Prismarine Bricks and Dark Prismarine, so it’s a great place to dump the blocks you pull out of an Ocean Monument. It also sells  Sea Lanterns and
  Sponges, which saves you from fighting Elder Guardians if all you want is a couple of Sponges for draining water.
Oceanographer Trades

 Prismarine
 Emerald Emerald
  Sea Lantern
 Prismarine Bricks Emerald Emerald
  Sponge
 Dark Prismarine Emerald Emerald
 Compass Emerald
 Nautilus Shell Emerald
 Heart of the Sea
The Master trade is the big one, a Trident for 32 Emeralds. It’s a plain Trident with no enchantments and the trade only has two uses before it needs restocking, but it’s still a lot easier than hunting Drowned and hoping for a drop. The Expert level sells a Heart of the Sea and Nautilus Shell too, so you can make a Conduit without looting a single shipwreck.
Netherologist
The Netherologist trades Nether blocks, and its workstation is the  Decayed Workbench. You make it from 2
  Nether Bricks on top of 4
  Warped Planks, which means you’ll need at least one trip to a Warped Forest before you can give a villager this job.


It buys  Basalt,
  Blackstone,
  Obsidian and
  Gold Ingots, and sells Nether Brick and
  Nether Quartz Ore. The Master trade is the Pigstep Music Disc for 20 Emeralds, which is normally only found in Bastion chests, so it’s a nice one for collectors that don’t fancy raiding a Bastion.
Netherologist Trades
 Basalt Emerald Emerald
 Nether Brick
  Blackstone Emerald Emerald
  Nether Quartz Ore
  Obsidian Emerald Emerald Compass
  Gold Ingot Emerald Emerald Compass Emerald
 Music Disc
 The real reason to get a Netherologist is the Fortress Explorer Map at Journeyman and the Bastion Explorer Map at Expert, since finding a Fortress by wandering the Nether can take ages. There’s a catch with both of them though, which is explained in the Explorer Maps section further down, so read that before you level one up.
Forester
The Forester is a wood trader, and it uses the  Forestry Bench, which some older versions and wikis call the Woodworking Table. You make it with 2 Leaves along the top, 2 Planks in the middle and 2 Logs on the bottom, and any wood type works for all three.


For its first three levels the Forester buys Saplings and sells Logs, 6 at a time for a single Emerald, and it covers Oak, Birch, Spruce, Dark Oak, Acacia and Jungle. There are four trades to choose from at each of those levels but a villager only gets two of them, so each Forester ends up covering a couple of wood types rather than all of them.
Forester Trades

 Oak Sapling Emerald Emerald
  Oak Log
 Birch Sapling Emerald Emerald
 Birch Log
 Spruce Sapling Emerald Emerald
 Spruce Log
 Dark Oak Sapling Emerald Emerald
 Dark Oak Log
 Acacia Sapling Emerald Emerald
 Acacia Log
 Jungle Sapling Emerald Emerald
 Jungle Log Emerald
 Crimson Stem Emerald
 Warped Stem Emerald
 Diamond Axe Emerald
 Diamond Hoe
 At Expert it sells Crimson Stems and Warped Stems, which is handy if you want Nether wood for building without going back through a portal. The Master level gives you an enchanted Diamond Axe and Diamond Hoe, and the price lands somewhere between 17 and 31 Emeralds because it goes up with the enchantment level.
Enderologist
The Enderologist is the End trader, and its workstation is the  Purpur Altar. The recipe is 2
  Purpur Blocks on top of 4
  End Stone, so you can’t make one until you’ve been to the End and killed the Ender Dragon, which is fitting since that’s where this villager’s best trades are.

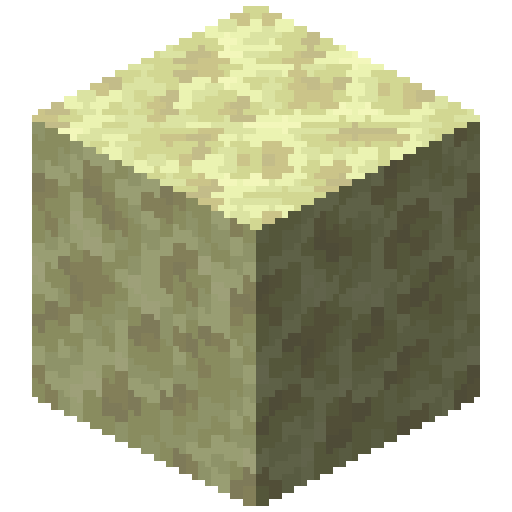

It buys End Stone,  Popped Chorus Fruit and
  Ender Pearls, and sells
  End Rods,
  Phantom Membrane,
  Firework Rockets and
  Dragon’s Breath. The Firework Rockets are the reason a lot of players get one early, since 8 of them for 3 Emeralds is a cheap way to keep an Elytra flying.
Enderologist Trades
End Stone Emerald Emerald  End Rod
  Popped Chorus Fruit Emerald Emerald
  Phantom Membrane
  Ender Pearl Emerald Emerald
  Firework Rocket Emerald
  Dragon's Breath Emerald Compass Emerald
  Shulker Shell Emerald
  Dragon Head
 The Master trades are the best in the whole mod. A Shulker Shell costs 12 Emeralds with 8 uses before a restock, so a Master Enderologist is basically an endless supply of Shulker Boxes, and the Dragon Head is 20 Emeralds for 2 uses. If you only set up one villager from this mod, it’s usually this one.
Engineer
The Engineer is the redstone villager, and it works at the  Blueprint Table. You make it with a Paper and a
  Blue Dye on the top row and 4 Planks underneath, and it’s one of the cheaper workstations, so it’s an easy one to set up early.


It buys  Redstone,
  Redstone Torches and
  Redstone Lamps, and sells pretty much every redstone part you’d want for a build. At Apprentice and Journeyman it has three options each and rolls two, so one Engineer might sell a
  Dispenser while another sells
  Droppers instead.
Engineer Trades
 Redstone Dust Emerald Emerald
 Redstone Repeater
  Redstone Torch Emerald Emerald
  Dropper Emerald
  Dispenser
  Redstone Lamp Emerald Emerald
 Observer Emerald
 Redstone Comparator Emerald
 Piston Emerald
 Sticky Piston Emerald
 Daylight Detector Emerald
 Hopper
 The Master Hopper for 7 Emeralds is the stand out trade, since each Hopper normally costs 5 Iron Ingots. An Observer for 4 Emeralds is good too, because it saves you from needing Nether Quartz, and a Sticky Piston for 6 means you don’t need any Slimeballs for your builds.
Florist
The Florist trades plants and bee stuff, and its workstation is the  Gardening Table. The recipe is 2 flowers on top of 4 Planks, and any small flower works, so a couple of Dandelions from right outside your house is enough.


It buys  Flower Pots,
  Vines and
  Moss Blocks, and sells
  Honeycomb,
  Glow Berries,
  Small Dripleaf and a
  Honey Bottle. That makes it a nice way to get Lush Cave plants without going looking for a Lush Cave, since both Glow Berries and Small Dripleaf are normally only found down there.
Florist Trades
 Flower Pot Emerald Emerald
  Honeycomb
  Vines Emerald Emerald
  Glow Berries Emerald
  Small Dripleaf Emerald
  Honey Bottle
  Moss Block Emerald Emerald Compass Emerald
  Bee Nest Emerald Compass
 At Master the Florist sells a Bee Nest for 6 Emeralds, and it comes as an empty nest you can put your own Bees in, which is a lot easier than breaking a wild one with Silk Touch. It also sells a Swamp Explorer Map at Expert and a Jungle Explorer Map at Master, which point you to a Witch Hut and a Jungle Temple.
Hunter
The Hunter trades mob drops, and it uses the  Hunting Post. You make it with a
  Leather and an
  Arrow on top of 2 Logs, so it’s cheap enough to craft on your first day as long as you’ve killed a Cow and a Skeleton.


It buys  Bones,
  Spider Eyes and
  Gunpowder, which makes it a great villager to have next to a mob farm, since those are exactly the drops that pile up in your chests. In return it sells
  Slimeballs, a
  Fermented Spider Eye and
  Magma Cream, all of which are awkward to get otherwise.
Hunter Trades
 Bone Emerald Emerald
  Slimeball
  Spider Eye Emerald Emerald
  Fermented Spider Eye
  Gunpowder Emerald Emerald
  Magma Cream Emerald
 Blaze Rod Emerald Compass Emerald
  Ghast Tear Emerald
 Rabbit's Foot
 Higher up it sells a Blaze Rod for 5 Emeralds and a Ghast Tear for 8, which means you can brew Regeneration potions without ever fighting a Ghast. The Expert level also has an Outpost Explorer Map, which is handy if you want to start a Raid on purpose for the Totems of Undying.
Miner
The Miner trades ores and stone, and its workstation is the  Mining Bench. The recipe is an
  Iron Pickaxe and a
  Raw Iron on top of 2
  Stone, and it has to be plain Stone, so Cobblestone won’t work for this one.


It buys  Deepslate,
  Raw Copper, Raw Iron,
  Raw Gold and
  Torches, and sells
  Calcite and
  Amethyst Shards. Selling Raw Iron for Emeralds is a nice option if you’ve got an Iron Farm running, although you’ll usually get more value out of smelting it for a Hopper trade with an Engineer.
Miner Trades
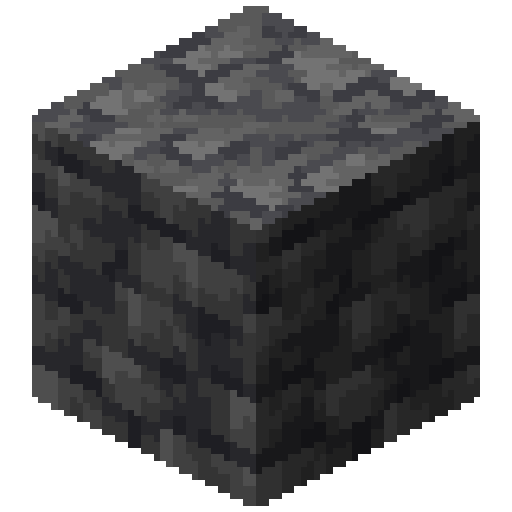 Deepslate Emerald Emerald
  Calcite
  Raw Copper Emerald Raw Iron Emerald
  Raw Gold Emerald Emerald
  Amethyst Shard
  Torch Emerald Emerald Compass Emerald
 Diamond Pickaxe Emerald Compass
 The Miner’s big trade is the Ancient City Explorer Map at Master, which costs 15 Emeralds and a Compass. Ancient Cities are buried deep in the Deep Dark and really hard to find by digging around, so this map can save you hours. It also sells a Mineshaft Explorer Map at Expert and an enchanted Diamond Pickaxe at Master.
Explorer Maps and the Nether and End Catch
Six of the eight new villagers sell at least one Explorer Map, and every map trade needs a Compass as well as the Emeralds. The table below shows which villager sells which map and at what level, since they’re spread out across the professions.
| Map | Villager | Level | Cost |
|---|---|---|---|
| Buried Treasure Map | Oceanographer | Journeyman | 13 Emeralds and a Compass |
| Fortress Explorer Map | Netherologist | Journeyman | 13 Emeralds and a Compass |
| Bastion Explorer Map | Netherologist | Expert | 14 Emeralds and a Compass |
| End City Explorer Map | Enderologist | Expert | 14 Emeralds and a Compass |
| Swamp Explorer Map | Florist | Expert | 13 Emeralds and a Compass |
| Jungle Explorer Map | Florist | Master | 15 Emeralds and a Compass |
| Outpost Explorer Map | Hunter | Expert | 13 Emeralds and a Compass |
| Mineshaft Explorer Map | Miner | Expert | 13 Emeralds and a Compass |
| Ancient City Explorer Map | Miner | Master | 15 Emeralds and a Compass |
Here’s the catch. A villager only looks for the structure in the dimension it’s standing in when the trade unlocks, so a Netherologist has to reach Journeyman and Expert while it’s actually in the Nether to offer the Fortress and Bastion maps, and an Enderologist has to reach Expert in the End for the End City map.

If you level those villagers up in the Overworld, the map trade just doesn’t show up, and it won’t come back later because each level only rolls its trades once. The easy fix is to bring the villager through a portal in a Boat or Minecart first, place its workstation over there, and level it up in the right dimension, which also counts for two of the mod’s advancements.
Village Houses
More Villagers also adds new houses to villages, but only for five of the professions. The Forester, Oceanographer, Florist, Hunter and Engineer get houses across Plains, Taiga, Savanna, Snowy and Desert villages, and each house comes with the right workstation inside, so you’ll often find these villagers already working when you arrive.
The Netherologist, Enderologist and Miner don’t have houses at all, so the only way to get them is to craft their workstation and give it to a villager yourself. The Hunter and Oceanographer houses also have a chest each, with Emeralds, Arrows, Ender Pearls, Leather and Apples in the Hunter’s, and Prismarine Crystals, Paper, Maps and Dried Kelp in the Oceanographer’s.
If the houses are too common or you don’t want them at all, the mod’s config file lets you turn them off for each village type and change how often each house is picked. The config is called morevillagers-common.toml, and every house starts with a weight of 10, so raising or lowering that number makes that one house more or less common.
Tips
Set up an Enderologist before anything else if you’ve already beaten the Dragon. Getting it to Master takes a while, but once it’s there you’ve got cheap Shulker Shells for as long as you want, and Shulker Boxes change how much you can carry on every trip.

Keep a Hunter right next to your mob farm’s collection chests. Bones, Spider Eyes and Gunpowder are always the drops you’ve got too many of, and turning them into Emeralds gives you a steady income you can spend on the other villagers.
Don’t forget the Compass for every map trade, as it’s easy to walk up to a Miner with 15 Emeralds and wonder why the trade is grayed out. Craft a small stack of Compasses before you go on a trading run, since they only need Iron and Redstone and you’ll get through a few of them.
Always trap your villagers with a workstation before you level them, especially the Forester and Engineer. Because they roll two trades out of three or four options, you can break and replace the block to reroll a villager you haven’t traded with yet, until it offers the Logs or redstone parts you want.
FAQ
Breed the ones you have by giving them free Beds and enough food, which is 3 Bread or 12 Carrots, Potatoes or Beetroots each. You can also cure Zombie Villagers with a Splash Potion of Weakness and a Golden Apple, and cured villagers give you cheaper trades too.
It only offers the map if it reached that level while standing in the Nether, since it looks for a Fortress in its own dimension. If you leveled it in the Overworld the trade won’t appear, so you’ll need a new Netherologist that you level up on the other side of a portal.
Most players go for the Enderologist first, because its Master trades sell Shulker Shells and a Dragon Head for Emeralds. The Engineer is a close second for redstone builders, since a Hopper for 7 Emeralds saves a lot of Iron.
Those three professions don’t have village houses in More Villagers, so they never spawn with a job already. You have to craft their workstation and put it near an unemployed villager, and it’ll take the job within a few seconds.


