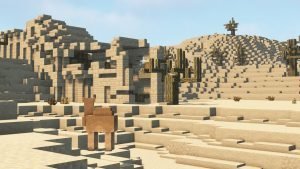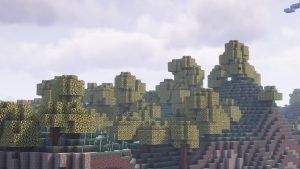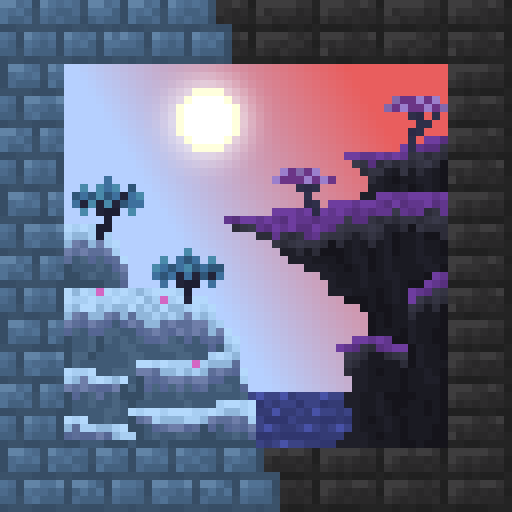
Blue Skies is a Minecraft mod that adds two new dimensions, the Everbright and the Everdawn, and you reach both of them through portals from the Overworld. Each dimension has its own biomes, ores, mobs, villages and dungeons, and each one ends with two bosses that have to be beaten in order. It plays a lot like a second game running alongside the normal one.

The thing most people don’t expect is that your Overworld gear doesn’t come with you. Weapons and tools from vanilla or any other mod are heavily weakened inside the Blue Skies dimensions, so you’ll be starting again with wooden tools made from the new trees. It sounds harsh, but it’s the reason the mod feels like a proper adventure rather than a quick detour.
This guide covers how to get in, what the two dimensions are like, the gear you’ll be working towards, how the dungeon keys work and how to beat all four bosses. It’s written for the 1.20.1 version of Blue Skies, which is the newest release and by far the most played, and most of it still applies to the older 1.18 and 1.19 builds.
How to Get to Blue Skies
You can’t just build a portal on day one, because the frame blocks and the lighter both come from inside the dimensions. Instead you’ll need to find a Gatekeeper’s house in the Overworld. These small houses spawn in the same places as normal villages, so plains, savanna, snowy and taiga biomes, plus mountains, and each one has a Gatekeeper living inside.
The Gatekeeper is a trader, and he sells the two things you need to start. The  Zeal Lighter costs 8
  Emeralds, and the
  Blue Journal costs a single
  Book. The Blue Journal only needs to be used once, and it unlocks an in-game guide tab in your inventory that fills in as you progress, which is worth having even if you’re following this guide.
Every Gatekeeper’s house has one portal frame already built into it, and that frame decides which dimension you’ll go to first. It’s a coin flip when the house generates. A frame made of  Turquoise Stone Bricks leads to the Everbright, and a frame made of
  Lunar Stone Bricks leads to the Everdawn. Right-click the inside of the frame with the Zeal Lighter to light it.
| Portal Frame | Leads To | Lit With |
|---|---|---|
| Turquoise Stone Bricks | Everbright | Zeal Lighter |
| Lunar Stone Bricks | Everdawn | Zeal Lighter |
Once you’re inside, you can make everything yourself. Turquoise Stone Bricks are crafted from four Turquoise Stone in a square, and the Zeal Lighter is a shapeless recipe of one  Charoite and one
  Moonstone Shard. That means your second portal, the one to the other dimension, can be built anywhere you like, instead of having to hunt down another Gatekeeper with the right frame.


The Zeal Lighter works like a  Flint and Steel for Blue Skies portals, and it’ll light a
  Campfire too. A normal Flint and Steel won’t open a Blue Skies portal, so if you’ve built a frame and nothing happens, that’s the first thing to check. The Gatekeeper’s Zeal Lighter trade has five uses before it restocks.

 4
4Turquoise Stone is found all over the Everbright, so the easiest time to make an Everdawn-to-Everbright link is after your first trip. Lunar Stone does the same job in the Everdawn. Bring a stack of the bricks home with you, as it saves a second trip if you want a portal at your main base rather than out at the Gatekeeper’s house.

 4
4Lunar Stone Bricks are made the same way, four Lunar Stone in a square, so a stack of either is plenty for a frame or two. Keep a spare Zeal Lighter in a chest at home too, as it’d be a long walk back to a Gatekeeper if your only one breaks while you’re on the other side.
The Everbright and the Everdawn
The Everbright is the colder of the two dimensions. It’s full of blue and turquoise grass, snowy pine forests, icy highlands and frozen oceans, and it’s the home of the Summoner and the Starlit Crusher. The Everdawn is warmer and darker, with purple and orange forests, crystal dunes and sunset maples, and it’s where you’ll find the Alchemist and the Arachnarch.
Both dimensions have their own villages with their own villagers and professions, so you can trade inside them the same way you would in the Overworld. They also have their own wood types and stone types, which is useful, because you’ll be rebuilding your whole toolkit from those materials anyway, so it’s fine to start with whichever portal you found.
The Everdawn is also where you’ll meet the Nyctofly, which is one of the most searched mobs in the mod. It’s a flying bug that picks up targets from a long way off, so it’ll often find you before you see it. It drops  Bug Guts and
  Slimeballs, and killing it counts towards the Everdawn’s bug-hunting advancement along with the Venom Spiders and the Arachnarch.
Why Your Overworld Gear Stops Working
This is the part that catches everyone out. Inside the Everbright and the Everdawn, any weapon that isn’t from Blue Skies only does 30% of its normal damage, and it can never hit for more than 7. Arrows and other projectiles from outside the mod are capped at 5 damage. Your enchanted Netherite Sword ends up roughly as useful as a stone one down there.
Tools get the same treatment. A pickaxe or axe from outside the mod mines at the speed of your bare hand while you’re in either dimension, and the game shows a message telling you it’s the wrong tool. So the first thing to do after arriving is punch a tree, make a  Crafting Table from the new planks, and work your way up from wooden and stone Blue Skies tools.
The code has a check that lifts this penalty once you’ve finished the mod’s progression, but in the current 1.20.1 version the bosses only move your progression partway, so in survival it never actually lifts. It’s best to think of it as permanent. Armor isn’t affected, so your Overworld armor still protects you, and anything from Blue Skies itself always works at full strength.
Ores, Tools and Armor
The ores are the same in both dimensions, which means you don’t have to visit both to gear up.  Pyrope Gemstone is common and shows up fairly high,
  Aquite is a little deeper, and Moonstone Shard ore can turn up almost anywhere.
  Diopside Gemstone and Charoite are the rare ones, and they only generate near the very bottom of the world.
| Material | Mining Level | Sword Damage | Full Armor | Notes |
|---|---|---|---|---|
| Pyrope | Stone | 5.5 | 12 | Very fast mining, low durability |
| Aquite | Iron | 6 | 15 | The first real upgrade |
| Horizonite | Diamond | 6 | 12 | Tools auto-smelt, sword sets targets on fire |
| Charoite | Diamond | 7 | 20 | Best armor, high durability |
| Diopside | Diamond | 9 | 16 | Best sword, 4.5 armor toughness |
Pyrope is the one to make first. Its tools only have the durability of stone, but they mine really fast, and a Pyrope pickaxe is enough to dig Aquite. You’ll need an Aquite pickaxe or better for Diopside and Charoite, so don’t skip the Aquite stage.
Pyrope armor is cheap too, since each piece is the same shape as vanilla armor, so a full set only costs 24 Pyrope Gemstones. It’ll carry you through your first few trips into either dimension until you find something better.


Aquite is the iron-tier option, and it’s where most people sit while they explore. Diopside and Charoite are the endgame gems, as they’re both diamond level. Diopside makes the hardest-hitting sword in the mod, while Charoite armor has the most protection. A lot of players end up mixing the two, with a Diopside sword and Charoite armor.

 Horizonite Ingot is only found in the Everdawn. Its tools don’t last long, but they auto-smelt whatever they mine, so ores drop as ingots, and the Horizonite Sword sets anything it hits on fire. The Everbright has two metals of its own instead, Falsite and Ventium, and Ventium is the one you’ll use most, for things like the Ventium Bucket and Ventium Shears.
Spears are another option for weapons, and they’re made from two sticks of any Blue Skies wood with a Moonstone Shard on top. They can be thrown, which helps a lot against the flying mobs in the Everdawn. The  Moonstone Shield is worth making too, as it’s the Blue Skies take on a normal
  Shield and blocks attacks the same way.


The shield is made from Vitreous Moonstone and a single stick, so it’s easy to put together once you’ve found a vein or two of Moonstone. It’s a good thing to carry in your offhand for the whole early game, as you’ll be fighting new mobs without knowing their attacks yet.


Keep a Blue Skies weapon on you even when you head back to the Overworld. Nothing about the mod’s gear is weaker outside its own dimensions, so a Diopside sword works just as well against Zombies as it does against the Starlit Crusher, and it saves swapping gear every time you go through a portal.
Dungeons, Keystones and Keys
Each boss lives in its own dungeon, and there are four of them, two in each dimension. The Everbright has a Blinding Dungeon for the Summoner and a Nature Dungeon for the Starlit Crusher, and the Everdawn has its own Blinding Dungeon for the Alchemist and a Poison Dungeon for the Arachnarch. The Blinding Dungeons are the most common, and the other two only spawn in one biome each.
| Dungeon | Dimension | Boss | Key | Found In |
|---|---|---|---|---|
| Blinding Dungeon | Everbright | Summoner | Blinding Dungeon Key | Calming Skies, Brisk Meadow, Brightlands, Snow Covered Pines |
| Nature Dungeon | Everbright | Starlit Crusher | Nature Dungeon Key | Snow Covered Pines |
| Blinding Dungeon | Everdawn | Alchemist | Blinding Dungeon Key | Shaded Woodlands, Crystal Dunes, Sunset Maple Forest and others |
| Poison Dungeon | Everdawn | Arachnarch | Poison Dungeon Key | Sunset Maple Forest |
The bosses aren’t sitting there waiting for you. Each dungeon has a Keystone, and you summon the boss by right-clicking the Keystone while holding four of the matching keys. All four keys get used up. The keys are hidden in chests around the dungeon, one per key chest, so exploring the whole dungeon is how you gather enough of them to start the fight.
If you’re short on keys, the Gatekeeper can sell them, but only once you’ve right-clicked that dungeon’s Keystone at least once. He gives one key per trade, and each trade can be used four times before it restocks. The Nature and Poison keys also need you to have beaten the first boss of that dimension, as the bosses have to be fought in order.
| Key | Gatekeeper Price | Unlocked By |
|---|---|---|
| Blinding Dungeon Key | 6 Books + 1 Emerald | Clicking either Blinding Keystone |
| Nature Dungeon Key | 6 Nature Stone + 16 Starlit Saplings | Clicking the Nature Keystone, after beating the Summoner |
| Poison Dungeon Key | 6 Poison Stone + 16 Spider Eyes | Clicking the Poison Keystone, after beating the Alchemist |
There are two more rules to keep in mind before you set off. Keystones refuse to do anything on Peaceful, so you’ll need at least Easy to fight any of the bosses. Explosions are also cancelled inside the dungeons, so you can’t just blast your way through the walls with TNT to reach the boss room, and you’ll need to find the proper way in.
Boss Difficulty and Loot
Every boss has a tier, shown next to its name on the boss bar, and the tier comes from your world difficulty. Easy gives you a Bronze boss, Normal gives Silver and Hard gives Gold. The tier changes how hard the fight is, and it also changes the rarity of the loot bag the boss drops when it dies, which is where all the good items come from.
| Tier | When | Common Bag | Uncommon Bag | Rare Bag |
|---|---|---|---|---|
| Bronze | Easy | 70% | 25% | 5% |
| Silver | Normal | 60% | 30% | 10% |
| Gold | Hard | 50% | 30% | 20% |
| Platinum | Respawned on Hard | 0% | 60% | 40% |
Each bag always has the boss’s Arc and usually an armor trim template, and the Summoner and Alchemist bags always have their signature weapons too. The rarer bags add an extra roll with the best drops, like the  Crushing Hammer from the Starlit Crusher. A respawned boss is one tier higher, so the only way to get a Platinum boss is to respawn it on Hard.
To respawn a boss, use its Arc on the Keystone instead of keys. It’ll summon the boss again at one tier higher than normal, and your Arc goes on a three-minute cooldown afterwards. This is the best way to farm the rare drops, as you don’t need to collect another four keys, and a Platinum boss can’t drop a common bag at all.
The Summoner
The Summoner is the first boss of the Everbright, and it’s found in the Everbright’s Blinding Dungeon. It has 350 health, which is the lowest of the four bosses, but it doesn’t fight alone. It summons golems and ranged minions to fight for it, fires magic spheres, and heals itself if you give it the time, so the fight gets harder the longer it goes on.

The best approach is to focus the Summoner itself and only deal with its minions when they’re actually in your way. It can only take 15 damage from a single hit, so there’s no point saving up one huge attack. A fast weapon that hits often does better here. Keep moving, as standing still makes you an easy target for the spheres.
Summoner Loot Bag

 Ethereal Arc
 Soulbound Spear
 Smithing Template
  Emerald Moonstone Shard
  Aquite
 Summoning Tome
 Falsite Ingot
 The Soulbound Spear is the Summoner’s signature drop, and it’s a thrown spear with Loyalty built in, so it always comes back to you. The Ethereal Arc is the other guaranteed drop, and it gives you extra movement speed. Beating the Summoner is also what unlocks the Nature Dungeon Key trade, so it’s the boss standing between you and the Starlit Crusher.
The Starlit Crusher
The Starlit Crusher is the second boss in the Everbright, and you’ll find it in the Nature Dungeon. The Nature Dungeon only spawns in the Snow Covered Pines, so you might have to look around a bit for it. The Starlit Crusher itself is a big tree creature, with 500 health and 10 armor, and it can’t be knocked back.

How hard the Starlit Crusher hits depends on its tier. On Bronze it’ll do 8 damage, on Silver it’s 10, and on Gold or higher it’ll do 12, which is a lot if you’re still in Aquite armor. So if you’ve only just got into the Everbright, it’s probably worth doing the fight on an easier difficulty first, and then coming back for it later.
The Starlit Crusher uses the whole forest against you. It’ll send roots up out of the floor, put up wooden walls to box you in, smash the ground, spit leaves and spin around, and it also calls in Spewters and Snow Owls to help it out. None of the attacks are too bad on their own, but when they all happen at once it gets pretty busy.
Melee hits from further than about four blocks away don’t do anything to it, so there’s no point using a weapon with extra reach. The best thing to do is stay close to it and keep hitting it, and when the roots start coming up, just take a step back until they’ve gone. The Starlit Crusher is always the main target.
Starlit Crusher Loot Bag

 Nature Arc
 Smithing Template
  Crushing Hammer
  Diopside Gemstone
 Saddle Falsite Ingot
 The drop that most people are after from the Starlit Crusher is the Crushing Hammer. It’s a big weapon that slams into the ground, hurting all the mobs around you and knocking them up into the air. It only comes from uncommon and rare bags though, so you might not get it the first time you beat the Starlit Crusher.
The other drop you’ll always get is the Nature Arc, which gives you some extra hearts that come back slowly over time. Since the Crushing Hammer isn’t guaranteed, the Starlit Crusher tends to be the boss people farm the most. If you respawn it with the Nature Arc on Hard, it’ll be a Platinum boss, and those can never drop a common bag.
The Alchemist
The Alchemist is the first boss in the Everdawn, and it’s the boss people search for the most. You’ll find the Alchemist in the Everdawn’s Blinding Dungeon, which is the more common type of dungeon, so it shouldn’t take too long to track one down. The Alchemist has 500 health, and it fights mostly from a distance rather than getting up close.

The Alchemist has quite a few attacks. It’ll throw clouds of potions at you, shoot bundles of fire arrows, drop rows of Decaying Spikes down from above you, and it can even change the liquids around it. The arena gets more and more dangerous the longer the fight goes on, so it’s worth trying to finish it quickly if you can.
You can hit the Alchemist from any distance, and a single hit can do up to 20 damage, which makes it a good boss for a Blue Skies bow or a few thrown spears. Just keep moving between each shot. It’s a good idea to bring a  Milk Bucket or two for the potion effects, and always look at the floor for the Decaying Spikes before you step forward.
Alchemist Loot Bag

 Dusk Arc
 Spike Shield
 Smithing Template
 Ventium Ingot
 Alchemy Scroll
  Horizonite Ingot
 Every Alchemist bag has the Spike Shield in it, which is the Alchemist’s own weapon, and the Dusk Arc. The Dusk Arc turns you invisible while you’re sneaking, which is really useful for getting past mobs in the Everdawn. The rarer bags can also have the Alchemy Scroll, which lets you drop the Alchemist’s Decaying Spikes in a line yourself.
Beating the Alchemist also unlocks the Poison Dungeon Key trade with the Gatekeeper. That’s the key you’ll need for the Arachnarch, so the Alchemist really is the boss that opens up the rest of the Everdawn. If you’re going to farm any of the Everdawn bosses, the Alchemist is probably the easier one to start with.
The Arachnarch
The Arachnarch is the final Everdawn boss, and she lives in the Poison Dungeon deep in the Sunset Maple Forest. She has 500 health and 6 armor, hits for 14 damage, and gets stronger with every extra player in the fight. She’s fast, she lunges at you from a distance, and she spends part of the fight climbing across the ceiling, where she drops down or spits venom.
Like the Starlit Crusher, she ignores melee hits from more than about five blocks away, and she caps at 15 damage from a single hit. The venom is the dangerous part, so bring ways to cure poison, and try to keep her on the ground. There’s even an advancement for landing the killing blow while she’s on the ceiling, if you’re feeling brave.
Arachnarch Loot Bag

 Poisonous Arc
 Smithing Template
 Venom Sac Diopside Gemstone
 Different Sword
 Spider Eye
 The Venom Sac is the Arachnarch’s rare drop, and it fires balls of venom at whatever you aim at. The Poisonous Arc gives you extra damage while you’re poisoned, which pairs nicely with a fight like this one. After the Arachnarch, you’ve beaten everything the Everdawn has, and the rest of the mod is about farming better bags.
Arcs
Arcs are the reward that sticks with you after every boss fight. They’re equipped in their own Arc tab in your inventory, which has four slots, so you can wear all four boss Arcs at once. Each Arc has a rarity from Common up to Empowered, and the higher the rarity, the stronger its ability.
An Arc’s rarity mostly matches the bag it dropped from. There’s a one in three chance it lands a step lower or higher, though, so a rare bag now and then gives you an Empowered Arc, which is the strongest version there is.
| Arc | Boss | Ability (Common to Empowered) |
|---|---|---|
| Ethereal Arc | Summoner | 10% to 25% movement speed |
| Nature Arc | Starlit Crusher | 1 to 4 extra hearts that regenerate |
| Dusk Arc | Alchemist | Invisible while sneaking, Empowered also hides armor |
| Poisonous Arc | Arachnarch | 1 to 4 extra damage while you’re poisoned |
Arcs also let you respawn their boss at a higher tier, as mentioned above. That makes them doubly worth keeping, since a Common Arc is still your ticket to a Platinum boss fight later on. If you get a better copy from a later bag, swap it in, and keep the old one for summoning so you don’t lose your equipped bonus to the cooldown.
Tips
There’s a few things worth bringing on your first trip through a portal, mainly food, torches and a stack of blocks. You don’t really need to bring your best weapons, since they’ll barely do any damage in Blue Skies, and even a wooden sword from Blue Skies will do more. Your armor is still fine to wear though, so keep it on.
Finding the dungeons can take a while, and it’s easier to look for them on the surface, either walking or on a mount, than it is to dig around. The Nature Dungeon and the Poison Dungeon only spawn in one biome each, and they’re quite far apart from each other, so if you can’t find one, head to a different patch of the same biome and look again.
Playing with friends makes the boss fights a lot easier, and everyone that’s near the boss when it dies gets the progress for it. Bear in mind that the Arachnarch gets tougher for every extra player in the fight though, so it’s not always easier with more people. The Blue Journal also keeps track of which boss is next, if you ever lose track.
Frequently Asked Questions
Find a Gatekeeper’s house in the Overworld and buy a Zeal Lighter from the Gatekeeper for 8 Emeralds. His house has a portal frame already built, made from either Turquoise Stone Bricks for the Everbright or Lunar Stone Bricks for the Everdawn. Light it with the Zeal Lighter and walk in.
The frame has to be the right block, Turquoise Stone Bricks for the Everbright or Lunar Stone Bricks for the Everdawn, and it has to be lit with a Zeal Lighter. A normal Flint and Steel won’t open it. The frame is a rectangle like a Nether portal, so check the shape and the corners if it still won’t light.
Weapons from outside the mod do 30% of their damage and never more than 7 inside the Everbright and the Everdawn, and outside tools mine at hand speed. It’s intended, so you’re pushed to use Blue Skies gear. The penalty doesn’t lift in survival in 1.20.1, but your armor isn’t affected at all.
Collect four of the dungeon’s keys from the key chests inside it, then right-click the dungeon’s Keystone while holding them. The Gatekeeper can also sell keys once you’ve clicked the Keystone. After the first kill, you can use the boss’s Arc on the Keystone to respawn it at a higher tier.