

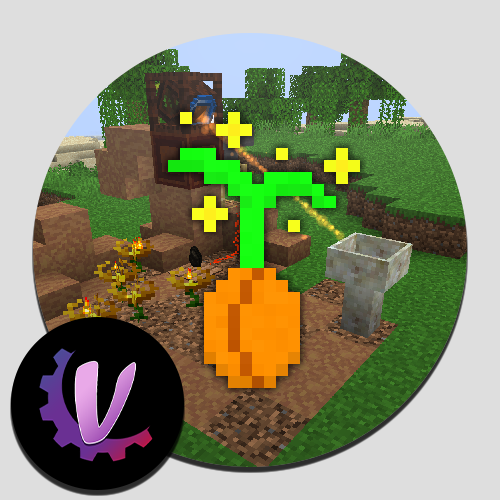
Botania is a natural magic mod built entirely around Mana, a form of magical energy you draw from flowers instead of ores or machines. Rather than cables and generators, you plant living Flora that turn everyday resources like coal, water, and experience into Mana, then pipe that Mana into pools, tools, and rituals to power everything the mod offers.
Your single most important item is the Lexica Botania, the in-game guidebook that documents every flower, block, and recipe. Hovering over any Botania item and pressing Control jumps straight to its page. This guide walks you through the full progression, from your first petals to defeating the Gaia Guardian and crafting its endgame relics.
Getting Started in Botania
Botania starts with flowers and a book. The early game is about collecting colored petals, building your first crafting station, and turning logs and stone into the mod’s two foundational materials. None of it requires automation yet, so you can progress comfortably by hand while you learn the systems.
Craft the Lexica Botania
Your in-game guidebook
Combine a Book with any Sapling in a crafting grid to make the Lexica Botania. This is the reference you will lean on constantly, since it explains every flower and recipe with diagrams. Holding any Botania item and pressing Control opens its exact page, making the book much faster than guessing recipes.


Gather Mystical Flowers and Petals
Pick flowers, then duplicate them
Mystical Flowers grow across the surface in all sixteen colors, marked by faint sparkles, with mushroom variants found underground. Breaking a flower gives two matching petals, and a tall flower gives four. You can plant petals on the ground and bone meal them to grow more, so a handful of starting flowers quickly becomes a full stock of every color.

To farm colors faster, craft Floral Fertilizer from Bone Meal and four Dyes, then right-click it on grass to scatter a large patch of new Mystical Flowers. Aim for a stack of petals in each color early, because mid-game recipes consume specific colors, and you do not want to stop and regrow flowers mid-build.


Build a Petal Apothecary
The first crafting station
The Petal Apothecary is where you craft your first flowers. Place it down, fill it with a Water Bucket, then drop your petals and a seed into it as the reagent.

A small tick icon appears once you have a valid recipe, and the seed thrown in last completes the craft. The water drains a little with each craft, so refill it from a Water Bucket whenever it empties.


Grow a Pure Daisy
Makes Livingwood and Livingrock

Make a Pure Daisy in the Apothecary using four White Petals plus a seed, then plant it. Place Logs and Stone in the eight blocks around it, then wait roughly 30 to 60 seconds. The Pure Daisy slowly converts Logs into Livingwood and Stone into Livingrock, the two materials from which nearly every Botania block is built.

Craft the Wand of the Forest
Binds and controls everything
The Wand of the Forest is your main tool, made from Livingwood Twigs and two petals of any color. It has two modes you swap between by sneaking and right-clicking.


Bind mode links blocks together, such as connecting a Mana Spreader to a Mana Pool, while function mode rotates and configures blocks. You will use this wand for the rest of the mod.

How Mana Works
Mana is the energy that powers all of Botania, and the system comprises three stages: generation, transport, and storage.
Flowers generate Mana from a resource, Mana Spreaders shoot it across space as glowing bursts, and Mana Pools store it until something draws on it. Understanding this loop is the key to the entire mod.
Generating Flora
Generating Flora are the flowers that produce Mana by consuming something nearby.

The Endoflame burns fuel like a furnace, the Hydroangeas drinks water, the Thermalily eats lava, and more advanced flowers consume food, cake, slime, or experience. Each flower stores a small buffer of Mana that a nearby Mana Spreader automatically pulls from.
Mana Spreaders and Transport
A Mana Spreader collects Mana from adjacent flowers and fires it in a beam toward whatever you bind it to.


Use the Wand of the Forest in bind mode to link a Spreader to a Mana Pool or a crafting block. The Pulse Mana Spreader variant only fires when given a redstone signal, which is useful for controlled setups.

Mana Pools and Storage
A standard Mana Pool holds up to one million Mana, which is a huge reserve early on but becomes a real bottleneck for endgame crafting.
A Diluted Mana Pool, made from Livingrock Slabs, holds only ten thousand and works for cheap recipes. Pools fill slowly, so plan to run multiple generating flowers into them.
Sparks and Mana Networks
A Spark sits on top of a Mana Pool and links wirelessly to other Sparks, forming a network that moves Mana without beams.
Spark Augments change how a pool behaves: Dominant pulls Mana inward, Recessive pushes it out, Isolated keeps a pool private, and Dispersive even recharges Mana items in nearby player inventories.
Hold the Wand of the Forest to see the Mana flow direction as an arrow. Sneak right-clicking a pool with the wand flips whether Mana flows into or out of a Mana Tablet or ring placed on it, which is how you charge portable Mana items.
Best Mana-Generating Flowers
Choosing the right generating flower depends on your stage of the game and what resources you have in bulk. The table below ranks the most practical options by fuel source, relative output, and their place in the progression.
There is no single correct answer, so lean on whatever materials you already produce easily. Note Endoflame and Hydroganeas perform similarly.
Endoflame
Entropinnyum
Gourmaryllis
Rosa Arcana
Endoflame


The Endoflame is the classic starter flower, crafted from two Brown Petals, one Light Gray Petal, and one Red Petal. It burns dropped fuel like coal, producing a steady trickle of Mana.

A single one is slow, but a row of Endoflames fed coal by an Open Crate is the cheapest, most reliable Mana farm in the early game.
Hydroangeas


The Hydroangeas absorb water as an energy source and convert this into mana, similarly to the Endoflame example above.

A popular method is to place the Hydroganeas Plants 1 block diagonal to a water source, which will automatically generate mana that the Mana Spreader collects and deposits into the Mana pool.
Entropinnyum
The Entropinnyum absorbs TNT explosions and converts each blast into a massive amount of Mana, effectively filling its entire internal buffer per explosion. After each blast, it pauses before it can absorb again.

Many players use a dispenser firing TNT into an obsidian pocket on a timer, and this single flower type can cover all Mana needs deep into the late game.
Gourmaryllis
The Gourmaryllis eats food and rewards saturation, generating more Mana from richer meals.
The catch is that it gives diminishing returns if you feed it the same food repeatedly, so you must cycle between different items like bread, potatoes, and carrots. It pairs well with an automated farm that outputs several crop types.
Rosa Arcana
The Rosa Arcana converts experience into Mana, drawing from both your own XP and nearby experience orbs.

Placed beside a gold farm or any mob grinder, it becomes a near-passive late-game Mana engine that runs while you do other things. It is a community favorite precisely because it scales so well with existing farms.
Begin with Endoflames and coal to get moving, then transition to an Entropinnyum or Rosa Arcana setup once you have automation. You rarely need both, so pick the one that matches the resources you already generate in bulk.
Mana Infusion and Crafting Stations
Once Mana is flowing, you unlock new ways to craft. Botania uses several specialized stations beyond the Petal Apothecary, each tied to a different tier of the mod. Learning what each station does and how to feed it Mana is the bridge between basic flowers and the powerful gear waiting later.
Mana Infusion in a Pool
The simplest Mana crafting is throwing items into a filled Mana Pool.

Output
Mana Cost
Iron becomes Manasteel, Diamond becomes a Mana Diamond, an Ender Pearl becomes a Mana Pearl, and Glass, Quartz, and Sugar each have their own infused versions. This does have a mana cost, but if set up correctly, this shouldn’t really be an issue.
Alchemy and Conjuration Catalysts
Place an Alchemy Catalyst beneath a Mana Pool to unlock transmutation recipes, turning materials into others cheaply, such as Rotten Flesh into Leather or Cobblestone into Sand.

It is extremely powerful for resource conversion farms that run on stored Mana while you are away.


Output
Mana Cost
The Conjuration Catalyst works similarly but duplicates certain items, including Glowstone, Coal, Netherrack, and Quartz. It triggers a chain reaction that replicates whatever you drop in, so use it with care in larger setups to avoid producing far more than you intend.


Output
Mana Cost
The Runic Altar and Runes
The Runic Altar crafts Runes, the reusable ingredients that gate most mid and late-game recipes. You place ingredients on it, power it with a Mana Spreader, then finish the craft with Livingrock and your wand. The four basic Runes are Water, Fire, Earth, and Air, with seasonal and deadly-sin Runes built from those.

A crucial detail many players miss: Runes used as ingredients to craft other Runes are returned to you, not consumed. Only the raw materials are spent. That makes the higher-tier Runes far cheaper to produce than they first appear, so do not hoard your base elemental Runes out of fear of wasting them.
Ingredients
Mana
Tools, Weapons, and Armor
Botania has three main metal tiers, each crafted from a Mana-infused material and each rechargeable from Mana rather than repaired at an anvil. As long as you carry a charged Mana Tablet or wear a Band of Mana, these tools effectively never break, which is their biggest advantage over vanilla gear.
Manasteel
Elementium
Terrasteel
Manasteel Gear
Manasteel is your first metal, made by throwing Iron into a Mana Pool.

The Manasteel Sword deals six damage at a 1.6 attack speed, and the full tool set adds quality-of-life perks: the pickaxe auto-places torches, and the axe places saplings. Manasteel armor offers protection comparable to iron but recharges from your Mana supply.

There is also a lightweight Manaweave armor set crafted from Mana Infused String. It gives weaker protection than Manasteel, but wearing the full set discounts the Mana cost of rods and tools and boosts the range and power of magical rods, making it a strong choice for a spellcasting playstyle.


Terrasteel Gear
Terrasteel is the upgraded tier, with 2300 durability, a stronger attack bonus, and Netherite-level mining.

The full Terrasteel armor set rivals Netherite for protection and grants passive Mana regeneration plus the ability to spend Mana to heal damage. The signature weapon is the Terra Blade, which fires a damaging energy beam when you are at full health. You’ll need to read the next section about the Agglomeration Plates.


Elementium Gear
Elementium comes from Elven trading and matches Manasteel’s protection while adding a chance to spawn friendly Pixies that fight alongside you when you take damage.

Its tools have standout perks: the pickaxe automatically discards junk blocks like cobblestone, dirt, and gravel as you mine, so only ores and other valuables fill your inventory, and the axe can decapitate mobs for heads and supports the Looting enchantment, which normal axes cannot. You’ll need to read the Alfheim Portal section to craft this armor set.
Terrasteel and Elven Trading
Crafting Terrasteel and opening trade with the elves of Alfheim is the gateway to Botania’s late game. Both require a lot of stored Mana, so make sure your pools are well stocked before you attempt them. This stage unlocks Elementium, Dreamwood, and the materials needed for the final boss. Remember: Manasteel Ingots are Iron Ingots thrown into a Mana pool.
Forging Terrasteel
Terrasteel is made on a Terrestrial Agglomeration Plate set in a cross of Livingrock and Lapis blocks. Runes are crafted using the Runic Altar.


Ingredients
Mana

You place a Mana Pearl, a Mana Diamond, and a Manasteel Ingot on the plate, then flood it with Mana using Sparks or a Spreader. Each ingot drains roughly half a full Mana Pool, so multiple Sparks speed things up dramatically.

Building the Alfheim Portal
The portal to Alfheim is a frame of Livingwood around an Elven Gateway Core, with Glimmering Livingwood at the top and bottom.

You also need two Natura Pylons over full Mana Pools within range of the core. Activating it with your wand consumes a large amount of Mana, though once open, the portal itself costs nothing to keep running.


The Natura Pylon is the upgraded version of the basic Mana Pylon, crafted by combining one with an Eye of Ender and Terrasteel Nuggets, which places it firmly in the late game. You only need it for the Alfheim portal, so two is all you have to build.
Trading with the Elves
You cannot walk through the Alfheim portal; instead, you throw items into it and receive upgrades back, drawing on nearby Mana.
Two Manasteel Ingots return Elementium, a Mana Pearl returns Pixie Dust, a Mana Diamond returns Dragonstone, and Livingwood Logs return Dreamwood. Elementium, Dreamwood, Pixie Dust, and Dragonstone are the backbone of the highest-tier recipes.
The Gaia Guardian Boss Fight
The Gaia Guardian is Botania’s boss and the source of its rarest crafting materials. It is summoned through a ritual rather than found in the world, and beating it drops Gaia Spirits used to make the mod’s strongest tools and trinkets. Prepare good armor and a charged Mana supply before you start.

Setting Up the Arena
To summon the boss, place an active Beacon and surround it with four Gaia Pylons in the pattern shown in the Lexica Botania. Clear a wide, open space around the Beacon, since the ritual needs an unobstructed arena. Offer a Terrasteel Ingot to the Beacon to begin the fight.


The ritual will not start on Peaceful difficulty. Set the game to Easy or higher first, or the Beacon simply refuses the Terrasteel Ingot. A missing Pylon or an obstructed arena will also prevent the summon.
Stats and Phases
The Gaia Guardian has 320 health in the standard fight, and once you face it as a group, that total climbs by twenty-five percent of its base health per player in the arena, so a duo fights one with roughly fifty percent more health.
Gaia Guardian
BotaniaThe fight has two phases: a teleporting melee phase, then a summoning phase once its health runs low.
Attacks and Strategy
Teleporting Strikes
Constant repositioning
In the first phase, the Guardian teleports rapidly around the arena and spawns small magic projectiles and Pixies. Pools of magic form on the floor and explode, so keep moving and never stand still. A bow helps when it blinks out of melee range.
Mob Summoning Phase
Triggers at low health
As its health drops near the end, the Guardian flies to the center of the arena and summons waves of mobs you must clear. Fighting during the daytime helps, since many summoned mobs burn in sunlight. Once the adds are dealt with, the Guardian returns to the ground for you to finish it off.
Drops, Rewards, and Hard Mode
The Guardian drops Gaia Spirits, which fuel the best gear in the mod, including the Gaia Mana Spreader, the Flugel Tiara for flight, the Shard of Laputa for raising floating islands, and the Cloaks of Judgment. The Gaia Mana Spreader is the strongest Spreader available and removes the throughput bottleneck of basic ones.


Combine four Gaia Spirits with a Terrasteel Ingot to make a Gaia Spirit Ingot, then use that instead of plain Terrasteel to summon a much tougher hard-mode Guardian that hits for up to fifteen damage. Beating it yields far more Spirits and a Dice of Fate, which grants a different unique relic each time you use it.
Rods, Rings, and Endgame Relics
Beyond gear, Botania offers a deep collection of magical rods and wearable trinkets that draw on the Mana you carry. Many are convenience tools, while the relics from the Dice of Fate are unique, one-per-world items with powerful effects. These define your endgame loadout.
Magical Rods
Rods consume Mana from your inventory to do useful things. The Rod of the Bifrost lays a temporary rainbow bridge for crossing gaps, the Rod of the Lands and Rod of the Depths conjure Dirt and Cobblestone, and the Rod of the Molten Core smelts blocks in place. They are graded crafts that often need Runes.
Rings and Trinkets
The Band of Mana stores Mana on your person to power tools and rods. The Ring of Magnetization pulls in dropped items, the Sojourner’s Sash boosts movement speed and step height, and the Flugel Tiara grants flight for up to a minute at a time before it needs to recharge. The Crimson Pendant makes you immune to fire and lava.
Dice of Fate Relics
Relics are unique items earned from the hard-mode Guardian’s Dice of Fate. The Ring of Odin grants ten extra hearts of health, the Ring of Loki lets you place blocks in mirrored patterns, and the Ring of Thor widens the Terra Shatterer’s mining area. The Key of the King’s Law summons a barrage of homing magical swords against enemies.
The Terra Shatterer
The Terra Shatterer is a Terrasteel pickaxe that grows stronger as you feed it Mana, climbing through tiers that mine ever-larger areas. Reaching its highest rank requires charging it with up to a billion Mana in total, making it a long-term project, but at full power, it clears entire walls of stone in a single swing.
Useful Apparatus and Gadgets
Botania includes a set of apparatus blocks that solve common problems and add precision to redstone and farming. These are cheap to make and worth setting up early, since they remove a lot of manual fiddling from your bases.
Open Crate
The Open Crate drops any item placed into it straight onto the ground below, which is the standard way to feed fuel to Endoflames or any flower that eats dropped items. When combined with a hopper and a redstone pressure plate, it forms a clean, semi-automated feeder.
Hovering Hourglass
The Hovering Hourglass is a precise redstone timer. It holds up to a stack of Sand, Red Sand, or Soul Sand, and the amount you load sets the interval: one block of Sand pulses every second, while a full stack pulses up to once every sixty-four seconds, flipping and emitting a redstone signal each cycle.


Mana Pylon and Botanical Brewery
The Mana Pylon placed beside an Enchanting Table boosts it just like a bookshelf, and only two are needed to reach level 30 enchantments. The Botanical Brewery lets you create Brews, Botania’s take on potions, which you can apply to vials or to an Incense Plate that emits the effect to anyone nearby like a small beacon.
Tips for Success
Lean on the Lexica Botania. Experienced players treat the in-game book as the real manual, hovering over any item and pressing Control to jump straight to its recipe and explanation. Botania has hundreds of items, and the visual diagrams in the Lexica are far faster than memorizing crafting grids.
Do not over-automate too early. A common piece of advice from longtime players is that a single hand-tended Pure Daisy and a modest Endoflame setup can carry you most of the way through the mod. Build automation when a bottleneck actually appears, not before, so you are not engineering contraptions for materials you barely need yet.
Pick one strong Mana engine and scale it. Players who finish Botania repeatedly point to the Entropinnyum on a TNT timer or the Rosa Arcana beside an existing XP farm as setups that comfortably cover Mana needs into the endgame. Rather than spreading across many flower types, commit to the one that matches your resources.
Remember that Runes are reusable. When crafting higher-tier Runes, the lower Runes used as ingredients come back to you. Once you have one set of elemental Runes, producing the seasonal and deadly-sin Runes only costs raw materials, so the deeper recipe tree is cheaper than it looks at first glance.
Watch the small requirements. The Petal Apothecary needs refilling with water, the Spectrolus must be fed wool in the exact color order or it is destroyed, and the Gourmaryllis wants varied food. These quirks trip up new players constantly, so check the Lexica entry whenever a flower seems to stop working.
Frequently Asked Questions
Plant a generating flower such as an Endoflame, place a Mana Spreader beside it, and bind the Spreader to a Mana Pool with the Wand of the Forest. The flower turns fuel into Mana, the Spreader carries it as a beam, and the Pool stores it for crafting and tools.
It has run out of water. The Petal Apothecary consumes water each time you craft a flower, and it stops accepting recipes once empty. Right-click it with a Water Bucket to refill it, then drop your petals and a seed back in to continue.
The Endoflame is the best starter, since it only needs petals to craft and burns common fuel like coal. A row of Endoflames fed by an Open Crate gives steady Mana while you build up. Most players later switch to an Entropinnyum or Rosa Arcana for far higher output.
The most common cause is playing on Peaceful, which blocks the ritual entirely. Switch to Easy or higher first. Also confirm all four Gaia Pylons are placed correctly around an active Beacon and that the arena is a clear, open space with no obstructing blocks.
Manasteel, Elementium, and Terrasteel tools recharge from Mana instead of breaking. As long as you carry a charged Mana Tablet or wear a Band of Mana, durability refills automatically as you use them, so they effectively last forever once you have a steady Mana supply.
Yes, the Flugel Tiara grants flight powered by your Mana, but only in bursts of up to about a minute before it overloads and needs to recharge. It is crafted with Gaia Spirits, so flight is a reward for defeating the Gaia Guardian rather than an early-game ability.


