The Create mod’s windmill is a self-contained rotational power source that requires no water flow, no terrain preparation, and no biome-specific placement. Every unit of power it produces comes from a single variable: the number of valid Sail blocks attached to its spinning contraption.
That predictability makes the windmill one of the most flexible early-to-mid-game power options available, scaling from a small 8-sail starter build all the way to a 128-sail dedicated power station. The functional core of any windmill is the Windmill Bearing, a block that converts the rotation of attached sail blocks into shaft power.
The bearing accepts Windmill Sails, Sail Frames, and wool blocks as valid sail material. At 8 sail blocks the windmill generates 1 RPM and 512 Stress Units, and at the maximum of 128 sail blocks output reaches 16 RPM and 8192 Stress Units, making it a competitive power source well into late-game play.
One persistent myth about the Create windmill is that height, biome, or in-game weather conditions affect its output. None of those factors apply. A windmill built at sea level in a Desert biome produces exactly the same power as one built at maximum elevation in a Snowy Slopes biome.
How Windmill Power Works
Rotational Force and Stress Units
Every machine in Create runs on two measures of rotational force: RPM and Stress Units. RPM determines how fast machines process items or perform actions. Stress Units represent the total power capacity the network can sustain before machines stall. The Stress Units can be seen by wearing the Engineer’s Goggles.

The windmill produces both in a fixed ratio, adding exactly 1 RPM and 512 Stress Units for every 8 valid sail blocks attached to the contraption. At 8 sail blocks, output is 1 RPM and 512 SU. At 16 sails, that doubles to 2 RPM and 1024 SU. This scaling continues in 8-sail steps all the way to the cap of 128 sail blocks, which yields 16 RPM and 8192 SU.
That capacity is enough to power a substantial number of machines simultaneously, and 16 RPM meets the speed requirement for most mid-game automation setups without any additional gearing.
Which Blocks Count as Sails
The Windmill Bearing recognizes a specific set of block types as valid sails. These are all 16 colored Windmill Sails, the Sail Frame, and any vanilla Wool block. Only blocks from this list add to the sail count and contribute to power output. Other blocks can be included in the spinning contraption for decoration, but they generate no power.

Wool is the most resource-efficient sail option for large-scale builds. Any wool color works, and players who farm sheep can accumulate enough for a near-maximum windmill without spending Andesite Alloy. Windmill Sails require Andesite Alloy to craft and offer 16 color options for players who want a specific aesthetic. Both options are functionally identical in terms of power contribution per block.


 2
2The arrangement of sail blocks does not affect power output. A flat disc, a cross pattern, four traditional blades, or any other configuration all produce the same output as long as the total valid sail count is the same. Windmill designers can prioritize appearance without sacrificing efficiency.
Crafting the Windmill Bearing
The Windmill Bearing is crafted in a Crafting Table using three ingredients stacked vertically in a single column: any Wooden Slab in the top slot, any Stone-type block in the middle slot, and a Shaft in the bottom slot. One craft yields one Windmill Bearing.


The Shaft in the bottom slot is made from Andesite Alloy, the foundational material of the Create mod. Andesite Alloy combines raw Andesite and Iron Nuggets and serves as the base ingredient for most mechanical components. Players who collect Andesite in bulk during early-game exploration will have the materials for multiple Windmill Bearings and still have Shafts left over for the power routing network.
Building Your First Windmill
Follow the steps below to build your first Windmill and generate power with it. Alternatively, use our 3D viewer at the top of this guide, which shows a relatively simple setup. You can use the layer slider to show individual layers and steps.
Place the Windmill Bearing
Placement surface determines the rotation orientation of the entire contraption
The Windmill Bearing determines the rotation plane for the entire windmill. Placed on a horizontal surface such as the ground or a rooftop, the bearing face points upward and the contraption spins in a vertical plane like a classic windmill.

Placed on a vertical surface such as a wall, the bearing face points outward and the contraption spins in a horizontal plane like a turbine. The bearing face is the side with the circular indent, and that is where all sail blocks attach.
Build the Rotor on the Bearing Face
Sail blocks and Sail Frames auto-attach to the bearing face with no glue required
Place sail blocks directly onto the bearing face to begin building the rotor. Windmill Sails and Sail Frames connect to the moving contraption automatically without requiring Super Glue or any additional configuration.

The first sail block placed on the bearing face starts the contraption. Additional sail blocks can be added adjacent to existing ones, extending the rotor outward in any pattern or direction.
Reach the Minimum of 8 Sail Blocks
The bearing will not activate with fewer than 8 valid sail blocks in the contraption
Continue adding sail blocks until the contraption includes at least 8 valid sail blocks counted by the bearing. A simple two-blade cross with each arm four blocks long hits exactly 8 sails and is the smallest functional windmill layout.
More blades or longer arms increase the count and the power output. Wool blocks count toward the minimum just as Windmill Sails do, so a mix of both is perfectly valid.
Apply Super Glue for Non-Sail Blocks
Only needed if the design includes decorative or structural blocks beyond sails and Sail Frames
Windmill Sails and Sail Frames attach automatically. Any other block type included in the design, such as planks, logs, or decorative blocks, requires Super Glue to become part of the moving contraption.


Right-click with Super Glue held to set one corner of a selection, then right-click the opposite corner to bind everything inside that cube together. Multiple overlapping Super Glue selections are allowed and can cover complex shapes.
Right-Click the Bearing to Activate
Click off-center on the bearing face with an empty hand to start the windmill
With the rotor built and all blocks properly attached, right-click the Windmill Bearing face with an empty hand. The click must land off-center, not on the exact center of the face, to trigger activation.

The windmill begins spinning immediately if all conditions are met: at least 8 valid sail blocks, a clear rotation arc, and an empty hand used for the click. Right-clicking the bearing again stops the contraption. Using a Wrench on the bearing while it spins reverses the rotation direction.
Walk the full circumference of where the sails will rotate and remove any solid blocks in the path before activating. A single block in the sweep area will prevent the windmill from starting. Blocks placed near a running windmill will also stop the contraption immediately if they intersect the rotation arc.
Power Output by Sail Count
The windmill’s output increases in fixed steps with every 8 sail blocks added. Builds in the 32 to 64 sail range offer a practical balance of output, resource cost, and physical space. A 64-sail windmill producing 8 RPM and 4096 SU is enough for a substantial automation setup and fits in a rotor roughly 9 blocks across, which is manageable in most base layouts.
RPM
Stress Units
Reaching the 128-sail maximum requires significant space for the rotor and careful planning of the rotation arc. The default minimum sail count required to start the windmill can be lowered in the Create configuration file, which is useful for players building small decorative windmills where visual scale matters more than power output precision.
Routing Power from the Windmill
The Windmill Bearing outputs rotational force through its back face, the side opposite from the rotor. A Shaft placed directly behind the bearing carries the rotation away from the windmill in a straight line. Shafts can run as far as needed before connecting to a machine or to a Gearbox that redirects the shaft run.
Using a Gearbox
A Gearbox receives rotation on one face and can output on any of the other four faces, making it the standard tool for routing power around corners, splitting output to multiple shaft lines, or reversing rotation on a specific branch.
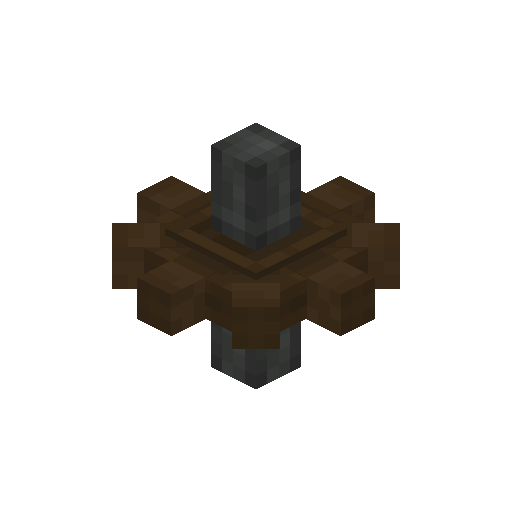
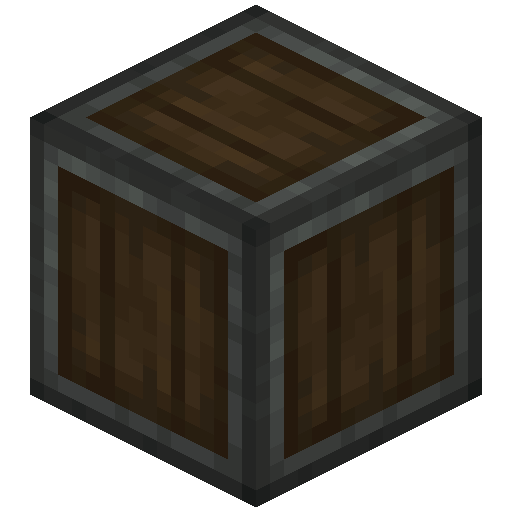


The most common setup connects a Gearbox directly behind the Windmill Bearing and runs separate Shaft lines from each Gearbox output face to the machines that need power. The Vertical Gearbox handles the specific case of transferring rotation between a horizontal shaft and a vertical one.

This is essential when the windmill sits on top of a tower and the machines are at a lower level. A Vertical Gearbox at the windmill’s output converts the horizontal shaft into a vertical shaft run that drops straight down to the processing floor below.
Powering an Automated Farm
A windmill with 8 to 16 sails generates enough power to run a Millstone, which grinds Wheat into Wheat Flour for more efficient bread production than crafting by hand. Routing windmill power to a Millstone and connecting a Wheat farm through Belts and Funnels creates a hands-free flour and bread line, one of the most practical early-game applications of windmill power. The Millstone’s speed scales with the RPM fed to it, so a larger windmill processes Wheat faster.
Windmill vs. Water Wheel
The Water Wheel and Large Water Wheel are the other primary passive power sources in Create. The Water Wheel is typically the first power source new Create players build because it requires only a water channel and minimal materials alongside the wheel itself.

Its output ceiling is much lower than the windmill, making it a starter source rather than a long-term solution for large automation setups. The windmill’s main advantage over both water wheel variants is placement freedom.
Water Wheels require a water source and functioning water flow, which limits where and how they can be built. The windmill has no terrain requirement and can be placed anywhere with enough rotation clearance, including indoors in a covered structure or on a floating platform, as long as the rotation arc stays clear.
Pros
- No water source or terrain modification required
- Scales up to 8192 SU and 16 RPM with 128 sails
- Placement works in any biome and at any elevation
- Sails and Sail Frames auto-attach with no glue needed
- Identical output regardless of weather or time of day
Cons
- Requires a minimum of 8 sail blocks before it will activate
- Large rotors need significant space for the full rotation arc
- Base RPM of 1 cannot be increased without a Rotation Speed Controller
- Non-sail decorative blocks require Super Glue to join the contraption
Design Tips for Windmills
Traditional windmill blades are built as four arms radiating from a central hub in a cross or X pattern, with each arm containing an odd number of sail blocks that taper wider at the tip. This distributes the sail count evenly across four blades and produces the silhouette associated with classic windmill designs. Players who want higher sail counts can extend existing arms, add extra blades, or fill a disc shape to pack more sails into a compact rotor.
Darker building palettes work well for windmill tower construction. Stone Brick or Deepslate Brick for the main tower paired with Dark Oak or Spruce logs for the housing produces a weathered medieval look that complements any sail color. Copycat Panels, a Create decorative block, can display the texture of any block and are useful for covering structural components with a different appearance without affecting the contraption or power output.
When building four-blade windmills, all blades should curve in the same rotational direction. A blade built in the reverse orientation looks mismatched once the windmill spins. Check the blade sweep direction on all four arms before activating, since correcting an asymmetrical blade after the fact requires stopping the contraption and rebuilding the affected arm.
Troubleshooting
The Bearing Will Not Activate
If right-clicking the Windmill Bearing does nothing, the two most common causes are an insufficient sail count and a blocked rotation arc. Confirm that the contraption includes at least 8 valid sail blocks, counting only Windmill Sails, Sail Frames, and wool blocks. Then walk the full circle the sails will sweep and look for any solid block in the path. Even a single block obstructing the arc will prevent activation.
Blocks Are Not Attaching to the Contraption
Only Windmill Sails, Sail Frames, and wool blocks attach automatically to the Windmill Bearing contraption. Any other block type, including planks, logs, or decorative blocks, requires Super Glue to join the contraption. If decorative blocks stay in place while the sails spin around them, add a Super Glue selection that encompasses both the sail blocks and the decorative blocks to bind them together.
Power Is Not Reaching Connected Machines
Shaft networks require all segments to face the same axis and connect without gaps. If a machine connected to the windmill is not running, check whether the combined Stress Units demanded by all connected machines exceeds the windmill’s output. A network consuming more Stress Units than the source provides will stall every machine in the network. Adding more sails increases output capacity, and disconnecting some machines temporarily reduces demand until a larger windmill is built.
The Windmill Stops Unexpectedly
A windmill that starts and then stops was blocked by something entering the rotation arc after activation. Foliage, falling blocks, or mobs can interrupt a spinning contraption. Check the entire sweep area for any block or entity that appeared after the windmill started, clear it, and then right-click the bearing to restart. Placing the windmill at an elevation where mobs cannot walk into the arc reduces this problem in survival.
Frequently Asked Questions
A windmill with 128 valid sail blocks produces 16 RPM and 8192 Stress Units, which is the default maximum. Each group of 8 sail blocks adds 1 RPM and 512 Stress Units, so the output scales linearly from the minimum of 8 sails (1 RPM, 512 SU) up to the cap. The 128-sail cap can be changed in the Create configuration file if a higher ceiling is needed.
No. The windmill’s output is determined entirely by the number of valid sail blocks in the contraption. Biome, elevation, weather, time of day, and proximity to other structures have no effect. A windmill at sea level in a Desert produces identical RPM and Stress Units to one at maximum build height in a Snowy Plains, as long as both have the same sail count.
Valid sail blocks are the Sail Frame, all 16 colored Windmill Sails (White, Orange, Magenta, Light Blue, Yellow, Lime, Pink, Gray, Light Gray, Cyan, Purple, Blue, Brown, Green, Red, and Black), and any vanilla wool block. No other block type contributes to sail count regardless of where it is placed in the contraption. Wool is the cheapest option since it requires no Andesite Alloy to produce.
Windmill Sails, Sail Frames, and wool blocks attach to the Windmill Bearing contraption automatically when placed adjacent to the bearing face or to other sail blocks already in the contraption. Any other block type requires Super Glue. Right-click two opposite corners of a cube with Super Glue held to bind everything inside that selection into the contraption. Multiple overlapping selections are allowed for complex designs.
The Windmill Bearing is crafted in a Crafting Table with three ingredients in a vertical column: any Wooden Slab in the top slot, any stone-type block in the middle slot, and a Shaft in the bottom slot. The Shaft is crafted from Andesite Alloy, which is made by combining Andesite with Iron Nuggets. Any wooden slab variant works for the top slot, including Oak, Spruce, Birch, Acacia, and Dark Oak slabs.