The Shulker Tower is a Legendary Monsters structure on the outer End islands, a tall End Stone Brick and Purpur tower lit with  End Rods. Vanilla
 Shulkers hold the lower floors and the Shulker Mimic sleeps near the top disguised as a
 Shulker Box, above two floors of End City treasure. Every tower’s the same building, so one climb teaches you all of them.
The reason to go is the  Large Shulker Shell the Mimic drops, which crafts the
 Shulker Shield and the
 Shulker Helmet. The helmet cancels Levitation outright, so the first tower’s the hard one and every tower after it is a loot run.
Finding the Structure
The tower only generates in End Highlands and End Midlands, so you need the outer islands past the void gap, and Better End adds a few of its own biomes to the list. They’re spread widely enough that wandering rarely works, so build the  Eye Of Shulker before you leave. It’s an
 Ender Pearl with
 End Stone above, below and either side.


You throw it the same way as an  Eye of Ender, it drifts off toward the nearest tower inside about 100 chunks, and you keep bridging the way it went. Arriving gives the advancement There Is No Gravity Here!, which tells you what the building does to visitors. The locate command works too if you’d rather skip the search.
Pack a stack of blocks for the island gaps and a  Potion of Slow Falling for the tower itself. Both matter more here than in an End City, because the tower’s floors have open sides and the ground floor Shulkers fire the moment you walk in.
The Eye Of Shulker is cheap enough to carry a few, as End Stone is everywhere out there and an Ender Pearl is one  Enderman. Throw one from each island you land on and you’ll rarely need the command at all.
Layout
The tower is a square shaft of  End Stone Bricks with
 Purpur Pillars at the corners and End Rods on every level. There’s no door, so you walk in at ground level and climb through open floors, past windows and ledges that Levitation will happily push you through. There’s only one template for it, so the layout you see is the one everyone sees.

There are four Shulkers stuck to the walls on the ground floor and four more on the middle floor, and the  Chests sit in a ring on the floor in between, so you’ll be looting with Shulkers above and below you. Kill them before you open a single Chest.
The Mimic’s floor is about two thirds of the way up with a second ring of Chests around it, and the loft above holds two real Shulker Boxes under a crown of Raw Gold Blocks. Those blocks are decoration, but they’re also free  Raw Gold.
Before you wake anything on the Mimic’s floor, wall off the open sides with  Cobblestone. Its Repel Slam shoves you 14 blocks and the Firework Grab drops you from about 10, and with the sides walled in you’ll take a bruise instead of a trip into the void.
The stairs are the only safe place to stand while a Shulker is still alive on a floor, because a bullet on an open ledge means drifting out over nothing. Clear each level fully before you climb to the next one.
Mobs
Two enemies live in the tower and they work together whether they mean to or not. The Shulkers soften you up with Levitation on the climb, and the Mimic punishes anyone who reaches its floor still floating.
| Mob | Health | Damage | What to Know |
|---|---|---|---|
| Shulker | 30 | 4 per bullet | Levitation I for 10 seconds, closed shell is 20 armor, teleports when hurt |
| Shulker Mimic | 200 | 11-15 melee, 5-8 bullets | Asleep as a Shulker Box, projectile immune, Levitation II bullets, Firework Grab |
Kill the Shulkers on the way up rather than running past them, since a bullet that lands on the stairs leaves you drifting toward a window with nothing to grab. A Shulker Helmet from an earlier tower makes them harmless, and until then a  Milk Bucket clears the effect.
Loot
Every Chest in the tower draws from the vanilla End City treasure table, the same one the ships and towers of an End City use. That means  Diamonds,
 Emeralds, Iron and Gold,
 Saddles and Horse Armor, and enchanted Diamond and Iron gear. Two rings of Chests and the two Shulker Boxes in the loft add up to a serious haul for one building.
The Mimic’s own drop is the prize of the whole building. It always leaves one Large Shulker Shell and 3 to 10 ordinary  Shulker Shells, and the loft’s Shulker Boxes are themselves worth carrying home.
Shulker Mimic Drops
 Shulker Shell
The Large Shulker Shell goes into either the Shulker Shield, with 5 End Stone around it, or the Shulker Helmet, with 5 Diamonds, and you’ll repair both with the ordinary shells. The Shield has 450 durability and a 60% chance to put Levitation II on whatever hits you while you block, and the helmet strips Levitation off you every tick.


Build the helmet first if you only have one shell, because it changes every future End trip rather than just this tower. The Shield is the fun one, but it doesn’t stop you being lifted.
The Boss
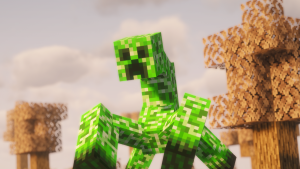
The Shulker Mimic sleeps on the upper floor looking like a Shulker Box, and nothing hurts it until it wakes. Walk within about 7 blocks and it unfolds over 2 seconds, then mixes lunges and slashes with a Repel Slam that shoves you 14 blocks and bullets that stack Levitation II.

It’s got 200 health, caps every hit at 21, ignores projectiles, and takes nothing while you’re more than 4 blocks above or below it. The fight gets busier as its shell cracks, and the full attack list and phases are on the Shulker Mimic page, which is worth reading before you climb.
Exploration & Strategy
The tower is a climb with a fight at the top, so treat the two halves differently. Everything below the Mimic is about not being lifted, and everything on its floor is about not being pushed.
Clear the Ground Floor
Four Shulkers, then the first Chests
Deal with the four ground floor Shulkers from outside the open side before you step in, since they fire the moment they see you. Move up to the Chest ring once they’re down and open everything, as nothing else on that level can hurt you.
Clear the Middle Floor
Four more Shulkers, then block the windows
The second set of Shulkers sits about halfway up, and this is where the open sides start to matter. Kill them one at a time with your back to a wall, then carry on up and wall off the Mimic’s floor before you go near the box.
Wake the Mimic
Within 7 blocks, on flat ground, Potions ready
Drink Slow Falling, put Feather Falling boots on and walk up to the box. Fight it level, circle to its sides for the melee, and never leave the floor for more than a few seconds, because it heals 20 health every three quarters of a second once it loses you.
Take the loft last, after the Mimic is dead, since the two Shulker Boxes are the only loot up there and the Raw Gold Blocks aren’t going anywhere. Climb down the way you came rather than jumping, because a drop from the loft will kill you and the island edge is close.
FAQ
Craft an Eye Of Shulker from 4 End Stone and an Ender Pearl and throw it on the outer End islands, where it flies toward the nearest tower within about 100 chunks. Towers only generate in End Highlands and End Midlands, so cross the void gap from the main island first.
Every Chest and both Shulker Boxes use the vanilla End City treasure table, so expect Diamonds, Emeralds, Iron and  Gold Ingots, Saddles, Horse Armor and enchanted Diamond and Iron gear. There’s a ring of Chests on the middle floor, another on the Mimic’s floor and two Shulker Boxes in the loft.
The one on the upper floor, about two thirds of the way up, sitting alone on the Chest ring. The two real boxes are higher still, in the loft under the Raw Gold Blocks, and they don’t move when you walk up to them.
You can loot the lower Chests without waking it, since it only stirs when something comes within about 7 blocks. The Chests on its own floor and the loft above are inside that range, so plan on the fight if you want the full haul or the Large Shulker Shell.