The Ruined Pyramid is the Legendary Monsters structure for the Desert, and the ruin sits right out on the open surface where you’ll spot it from a long way off. It comes with its own guardian and a drop you can’t get anywhere else.
Standing on the platform in the middle is a Dune Sentinel, a stationary war machine that lobs bombs at anything that wanders in. It drops the  Crystal Of Sandstorm, while the Bombers around the ruin drop
 Ancient Sandstone Shards, and the
 Sand Cannon is built from both. There’s a sealed chamber under the floor too, and it’ll drop you into Lava if you’re careless.
Finding the Structure
The Ruined Pyramid only generates in Desert biomes, on the surface, and it’s spread a lot thinner than the vanilla Desert Pyramid is. Pyramids sit about 40 chunks apart, so you won’t stumble across two of them on the same trip. If you’re running Biomes We’ve Gone, three of its Desert and Badlands biomes are on the list as well.
Rather than walk the dunes looking for one, craft an  Eye Of Sandstorm. It’s 4
 Sandstone around 1
 Ender Pearl, and it works the way an
 Eye of Ender does, flying off toward the nearest pyramid within about 100 chunks. It survives the trip 4 times out of 5 and drops back for you to pick up, so one or two will usually do.


On a world with cheats enabled, you can skip the Eye entirely. The command below gives you the coordinates of the nearest pyramid straight away, which is quicker if you’re just scouting a seed.
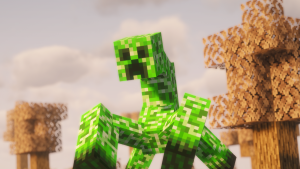
From a distance a Ruined Pyramid looks a lot like a vanilla Desert Pyramid, and plenty of people have walked to the wrong one. Check for the corner towers before you commit to the walk, as the vanilla one has none.
Layout
Most of the pyramid has already collapsed by the time you find it. What’s left is a wide Sandstone platform open to the sky, with drifts of sand across it and four corner towers still standing about 13 blocks above it. There’s no door and nothing sealing the outside, so you can walk straight in from any side.
Each corner tower is a hollow shaft with a  Chest sitting inside it at floor level. Two blocks under that Chest, walled into a cell of its own, is a mob spawner. Two of the four run Bombers and the other two run
 Husks, so the towers keep feeding while you work.
The middle of the floor rises into a low platform carrying the Orange and  Blue Terracotta pattern from a vanilla Desert Pyramid, with an
 Iron Trapdoor set into the center of it. That’s the lid on the hidden chamber, and the Dune Sentinel stands on top of it until the fight is over.
 Suspicious Sand covers the rest of the floor, the other reason to pack a
 Brush.
The Hidden Chamber
The trapdoor is Iron, so it won’t open by hand and you’ll have to break it to get through. Everything under it is worth a little care, as the chamber has a trap built into the floor rather than just loot sitting in it.
Break the Iron Trapdoor
Center of the terracotta
Mine the Iron Trapdoor out of the middle of the terracotta pattern and drop down the shaft underneath it. You’ll land in a small square chamber under the platform, which is where everything that matters down here is kept.
Brush the Suspicious Sand
One guaranteed shard
There’s a single Suspicious Sand block at your feet when you land, and it always holds an Ancient Sandstone Shard. Brush it out and you’ve got the one shard in the ruin you don’t have to go hunting for, which is a fair reason to come down here even if you leave the rest of the room alone.
Leave the Wall Blocks
Or come in from the side
A Block of Gold, a Block of Iron, a Block of Diamond and a Block of Emerald are set into the walls around a potted  Oxeye Daisy, and they’re there as bait.
 Observers sit behind the Block of Diamond, so that’s the one wired to it, and the floor you stand on is a 3 by 3 lid held up by
 Sticky Pistons over a pool of Lava.
The lid is pulled sideways rather than dropped, so there’s no crack, no warning and nothing left to jump onto. A  Potion of Fire Resistance before you go down covers it, or you can tunnel in from the side so you’re standing on your own blocks.
So brush the sand around the edges of the chamber first, and leave the middle until you’ve worked out which block sets it off. There’s no rush, as nothing down there moves.
Mobs
Three things will be shooting at you or running at you in a pyramid, and two of them come from this mod. The table below shows how they compare, with the Husk there for scale.

Dune Sentinel

Bomber
Husk
The Dune Sentinel doesn’t move and can’t be knocked back, so the fight happens on its terms. It lobs bombs from range and swings hard at anything that gets close.  Arrows and explosions are ignored, so bring a weapon rather than
 TNT or a Sand Cannon. Its swing also hits harder on Easy than on Hard, which the Dune Sentinel page covers.
Bombers are this mod’s version of a  Creeper, only quicker. They light the fuse inside about 3 blocks and the blast is the same size, but it also leaves the Curse Of Desert, which turns your camera upside down for 8 seconds. Blocking with a
 Shield as it goes off skips the curse completely, so keep one on your offhand.
Husks fill the other two spawners and behave the way they do anywhere else in a Desert. They’re mostly there to soak up your time and your durability while the Bombers walk in behind them, which is why the towers are worth shutting down early.
Loot
The Chests in the corner towers roll the vanilla Desert Pyramid table, so it’s the same spread of Gold,  Emeralds, Horse Armor and the occasional
 Enchanted Golden Apple you’d pull out of a normal temple.

Each Chest rolls two to four times on the list below, with a few stacks of  Bones,
 Gunpowder,
 String, Sand and
 Rotten Flesh thrown in on top of that.
Corner Tower Chests
 Bone
 Rotten Flesh

 Spider Eye

 Saddle

 Book

 Golden Apple

 Iron Ingot

 Gold Ingot
 Emerald

 Iron Horse Armor

 Golden Horse Armor

 Diamond

 Diamond Horse Armor
 Enchanted Golden Apple

 Smithing Template
Ancient Sandstone Shards are the real reason to make the trip out. Bombers drop one every time along with 1 to 4 Gunpowder, and the Suspicious Sand spread across the floor gives up plenty more, although roughly a third of those blocks come up with nothing in them at all.
Brushing the Suspicious Sand

The Crystal Of Sandstorm only comes from the Dune Sentinel, one per kill, and as there’s a single Sentinel per pyramid that’s your limit for the trip. Both of the things worth crafting want a crystal each, so a second ruin is the price of owning the pair of them.


The Sand Cannon takes 4 Gunpowder, 4 shards and the crystal, and throws the same bombs the Sentinel does. The  Blastproof Helmet takes 4 shards, a crystal and a
 Gold Nugget, and takes 35% off any explosion damage that reaches you. If you end up with spare shards, 4 of them will craft into a
 Chiseled Sandstone.
The Boss
Nothing summons the Dune Sentinel, it’s placed in the structure the moment the pyramid generates and it’s already standing there waiting. It won’t despawn and it won’t follow you either, which cuts both ways: you can walk off and come back in better gear, but you can’t drag it off the terracotta to fight it somewhere kinder.
With 170 health and 16 armor, it’s a grind rather than a burst, so bring plenty of food. Its range only reaches 30 blocks, so you can set up just outside that and start when you’re ready. Killing it gives you the Crystal Of Sandstorm and the Ancient War Machine advancement, and it frees up the trapdoor. The full attack breakdown is on the Dune Sentinel page.
Exploration & Strategy
A pyramid trip is a daytime job with a bit of digging in it, so the list below is short and most of it is already in your inventory. The Brush is the one people forget, and it’s the only way into the Suspicious Sand.
Daylight is the single biggest thing in your favor here. Bombers only spawn naturally in the Desert once it gets dark, and the four tower spawners have a light check of their own, so a morning visit is far quieter. A ring of  Torches around each tower base holds them off while you loot, but mining the spawner out lasts.
Clear the Sentinel before you touch anything in the middle. The corner towers all sit inside its 30 block reach, and you can’t brush the center of the floor or reach the trapdoor while it’s alive. Melee is the only real option, as Arrows and explosions are both ignored, so a decent sword will get further than a full quiver.
Keep the Shield on your offhand the whole time you’re inside, as it blanks the Curse Of Desert from a Bomber blast. It won’t hold against the Sentinel, though, since its swing puts a raised Shield on a 2 second cooldown. The spare blocks are for walling off a tower shaft, and for patching the chamber floor before you start pulling anything out of those walls.
FAQ
Desert biomes only, right on the surface, and about 40 chunks apart from one another. That makes it a fair bit rarer than a vanilla Desert Pyramid, so a long stretch of Desert can easily have none at all. Biomes We’ve Gone players get three extra biomes on the list as well, like its Mojave Desert and Windswept Desert.
Bombers drop one every single time, and they spawn across any Desert once it gets dark, so you don’t strictly need the pyramid for them. The ruin is still the densest source going, between the two spawners running and the Suspicious Sand over the floor. Brushing is slower than fighting, though it’s a lot safer and it turns up Diamonds and Emeralds as well.
That 3 by 3 floor is a lid held up by Sticky Pistons over a pool of Lava, and there are Observers built in behind the Block of Diamond in the wall. Pulling it out cuts the power, and the lid slides out from under your feet. Drink Fire Resistance first, or tunnel in from the side so you’re on your own blocks when it goes.
Both recipes want a Crystal Of Sandstorm, and the only source is the Dune Sentinel, which is one per structure. So a single pyramid gets you one or the other, and you’ll need a second ruin to end up with the pair. The shards are the easy half of it either way, since Bombers hand those out anywhere in the Desert.