


The Flameborn Guard is one of two Flameborn mobs holding the Legendary Monsters Space Station out in the End, standing 3 blocks tall with a wide sweeping weapon and a Shield it actually uses. It blocks, it teleports behind you, and it drops  Enderitium Gems every single time.
You’ll run into them almost straight away once you’re inside, normally sharing a room with a Flameborn Warrior or two. They’ll cross a room quickly once they’ve seen you, though the follow range is only 20 blocks, so you can pull them a room at a time if you take it slowly. Anything you bring that shoots is going to disappoint you against either of the Flameborn.
Spawning
The Space Station only generates in the End, on the three biomes below, 80 blocks above the surface and never within 6 chunks of an End City. Stations sit roughly 110 chunks apart, so an  Eye Of Annihilation thrown in the End is far less painful than flying a grid, as it points at the nearest one within about 100 chunks.
Several BetterEnd biomes and the Hasturian Wastes from Eldritch End are listed as well, so the station will turn up in those too if you have them installed. If you’d rather skip the Eye, the structure command works the same way.
Flameborn Guards don’t spawn naturally in any biome or dimension, as there’s no spawn entry for them at all. Every one you meet was placed when the structure generated, and they’re all persistent, so they’ll still be standing there when you come back. A few sit in most modules, and outside of that the only way to get one is the  Flameborn Guard Spawn Egg.
Behavior
Guards go after players,  Iron Golems and
 Snow Golems, and they’ll also pick fights with Choruslings and Chorusents on sight, which does happen on its own inside the station. Everything else on the Annihilation side is friendly to them, so the Warriors, Flame Drifters, Wandering Eyes, the Annihilation Pursuer and The Obliterator will never trade blows with one.
Sweep
12 damage in a wide arc
The Guard lunges a short way toward you, then swings across everything in front of it, out to about 3 blocks and up through its full height. It’s 12 damage a hit, and the swing lands less than a second after the lunge starts, so backing away once it moves usually isn’t enough. Block it with a Shield and the Shield’s disabled for 1.5 seconds as well.
Double Sweep
Two swings back to back
This is the same swing twice, the second arriving a little over half a second after the first. That gap is shorter than the Shield disable from the first hit, so you’ll be standing there with a Shield you can’t raise when the second swing comes through. Backing outside its reach between the two beats trying to block through it.
Block And Teleport
Once every 3 seconds
Hit a Guard while it’s standing idle and it’ll put the Shield up instead, which negates the hit completely. It stays immune for about three quarters of a second, and roughly half a second in it teleports to a spot 4 blocks behind you, so you’ll be turning around either way. Once the animation finishes it needs 3 seconds before it can block again.

It can’t block while it’s in the middle of a swing, though, and that’s really the whole fight in one line. Let it commit to a Sweep, get your hits in while the animation plays out, then back off before the next one starts. Swinging at a Guard that’s just standing there mostly triggers the counter and moves it behind you.
Weaknesses and Immunities
The Guard’s immunities are what make a room of them feel harder than their health suggests. Most of the usual shortcuts are off the table, starting with anything you’d fire at it.
 Arrows,
 Tridents, fireballs and thrown items are ignored outright, and a projectile hit teleports the Guard a few blocks away instead of hurting it. Splash Potions still land, as Harming doesn’t count as a projectile.
Everything it does take is cut by 25% before its 8 armor comes off the top, so 60 health takes longer to get through than the number suggests. It’s immune to fire and fall damage and has full knockback resistance, so Fire Aspect and Knockback are dead weight in here.

Dropping one off the edge of the station doesn’t work either. Once it’s fallen more than 10 blocks it teleports straight back to whoever it was chasing, so the void won’t finish it off for you.
What’s left is plain melee damage and Potions, and neither of those is affected by any of the above. Raw damage per swing matters more than swing count here, since your openings are short and the 25% cut takes a bite out of every one of them.
Guard vs Warrior
The two Flameborn look alike from a distance, so check which one you’ve got before you commit to a swing. The answer changes what you do with your Shield, as only one of them can take it off you.
Flameborn Guard
Flameborn Warrior
Both are 3 blocks tall and both hit for 12, which makes them easy to confuse in a corridor full of them. The Guard is the one carrying a Shield, it swings a little further, and it’s the only one of the two that can take your Shield off you. Warriors do share the projectile immunity and the teleport, so a  Bow is no better against those either.
In short, the Warrior is the one you can block through and the Guard is the one you wait out. Both are worth killing, as the Enderitium Gems come off either of them.
Drops
Every Flameborn Guard drops Enderitium Gems when it dies, and it’s a guaranteed drop rather than a chance. It’s 1 to 7 a kill, which beats the Warrior’s 1 to 2 by a long way, so the Guards are the ones to hunt when you’re short.
Flameborn Guard Drops
Enderitium Gems are the reason to fight through the station at all, as they’re the End tier material for the whole mod. Nine of them press into an  Enderitium Ingot, which the Enderitium smithing upgrade wants for turning Diamond equipment into Enderitium. The template for that upgrade is
 Chest loot from the station itself, and Looting doesn’t change the Gem drop.
Gems go into two other things as well. 4 of them around an  Eye of Ender makes the Eye Of Annihilation, which throws like a normal Eye and points at the nearest Space Station, and 6 with 2
 End Stone and an
 Eye Crystal makes the
 Buckler Of Annihilation. Killing one Guard and one Warrior also gives you the Flame Of The End advancement.


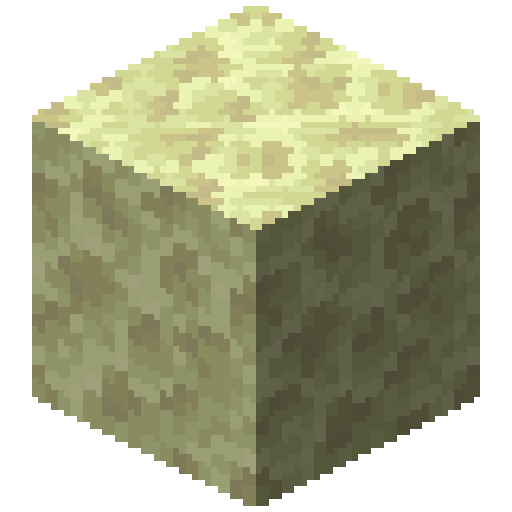


You can get Gems without fighting anything at all, too.  Enderitium Ore generates through End Stone anywhere from Y -64 up to 80 and gives 1 to 5 per block, with Fortune applying on top of that. A Guard gives more per kill than a block of ore does, though the ore is the safer of the two if your gear isn’t ready yet.
Tips
Hit a Guard during its own swing animation, as it can only block while it’s standing idle. Let it start a Sweep, stay out of reach until the swing lands, and keep hitting until the animation ends. The 3 second cooldown after a block is a free window too, if you do end up triggering one.
Leave the Shield at home when there are several of them in a room. Every sweep you block disables it for 1.5 seconds, and with two or three Guards swinging that adds up to a Shield that’s down more often than it’s up, whereas armor keeps working the whole time.
Clear the Flameborn Warriors first when they’re mixed in. They’ve got less health and no block, so the room thins out faster, and you won’t have one hitting you from behind at the moment a Guard teleports there as well.
None of these are essential for a 60 health mob on its own. In a station with several of them and the Warriors alongside though, a Sharpness Sword and good armor are what keep the visit short.
FAQ
Every projectile damage type is thrown away before it lands, so Arrows, Tridents, fireballs and thrown items all come out as nothing. On top of that the hit moves the Guard to a random spot a few blocks away. Melee and Splash Potions are the way in, as Harming isn’t counted as a projectile.
The teleport is part of the block, so it only happens on a hit the Guard actually blocks. It can’t block while it’s swinging, so hits landed inside its own attack animation never trigger it. After one does go off it’s locked out for 3 seconds, and that’s the window to spend everything you’ve got.
Every Guard is placed when the structure generates and they’re all marked persistent, so none of them respawn and none of them despawn while you’re away. Clearing a station clears it for good, which makes it worth doing room by room rather than sprinting past everything. The Spawn Egg is the only way to add more.
9 of them make an Enderitium Ingot, which feeds the smithing upgrade that turns Diamond equipment into Enderitium equipment. Smaller handfuls go into the Eye Of Annihilation for finding more stations, and into the Buckler Of Annihilation alongside an Eye Crystal. Enderitium Ore in the End gives them as well, so you’re never locked out if a station goes badly.


