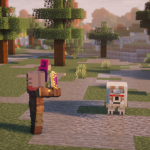
Aether Legends brings the beloved paradise dimension to Bedrock, turning the sky into a whole world of floating islands, glowing ores, and strange creatures. Instead of digging down, you build up and out into a realm of Skyroot forests, Holystone cliffs, and drifting clouds. The trade-off for all that beauty is a long fall into nothing if you slip.
This is a huge add-on with three bosses, a full artifact system, roaming Angel Traders, key-locked dungeons, and rideable mounts. Progression runs from Skyroot tools up through Zanite and Gravitite gear, then into the endgame sets you earn by defeating the Slider, Karthuul, and the Valkyrie Queen. This guide covers all of it, grounded in how the add-on actually plays.
One rule shapes everything: the Aether has no bedrock floor. Fall off an island and you drop back to the Overworld from the sky, taking fall damage on landing. So your first real investment is not a weapon but a way to survive the void, because half of surviving the Aether is simply not falling out of it.
Getting Started in the Aether
The Aether is reached through a portal you build much like a Nether portal, then everything else follows the classic mining loop with a skyward twist. The steps below cover your first in-game hours, from opening the portal to locking in a respawn point so a single fall does not cost you everything.
Build and Light the Aether Portal
Glowstone frame plus a Water Bucket

Build a portal frame out of Glowstone in the same rectangular shape as a Nether portal, then use a Water Bucket on the inside to activate it. The frame accepts any water-holding bucket, and once the shape is valid the portal opens and pulls you into the Aether after a short delay. Naturally formed portals also appear scattered around the Overworld.
The in-game Aether Guide Book is crafted from a single block of Dirt, so make one early. It walks through the add-on’s systems in the author’s own words and costs almost nothing to keep on hand.
Gather Skyroot Wood and Holystone
Your first tools in the sky
Chop the Skyroot and Aurea trees on the islands for planks and sticks, then craft basic wooden tools. Holystone forms the bulk of the islands and behaves like the Aether’s cobblestone, and mining deeper exposes Arkslate for the sturdier stone tier. Bring blocks to bridge gaps, since a missed jump means a trip back to the Overworld.
Mine Zanite and Ambrosium
Light and your first gems
The Aether’s ores appear inside every stone type, so watch the walls as you dig. Zanite Gems are your first real upgrade material and double as the currency the Angel Traders accept, while Ambrosium Shards light your way as Ambrosium Torches and power your respawn point. Grab plenty of both, since Ambrosium is the fuel that keeps you anchored to the Aether.


Craft Zanite Gear and Set a Sky Anchor
Lock in a respawn point
Turn your Zanite Gems into a Zanite Sword, tools, and a full armor set to handle the first wave of Aether monsters. Just as important, craft a Sky Respawn Anchor from Holystone and Blocks of Ambrosium, place it, and charge it with Ambrosium Shards so it becomes your bound respawn. Without one, dying in the Aether drops you all the way back to the Overworld.


Hunt Gravitite for Endgame Gear
The Aether’s best crafted material
Gravitite is the Aether’s top crafting material, sitting at the diamond mining tier. Mine Raw Gravitite from ore, refine it into Gravitite Plates, and build a full Gravitite weapon, tool, and armor set that outclasses everything Zanite offers. If crafting the whole set feels slow, the Angel Smiths will convert your vanilla iron and diamond gear into Gravitite equivalents using Raw Gravitite directly.


Surviving the Floating Islands
The Aether rewards exploration but punishes carelessness, and the punishment is almost always the same: a long drop into open air. A handful of blocks and items exist purely to keep you alive up here, and setting them up early turns the sky from a death trap into a playground you can actually use.
Falling and the Void
There is no floor beneath the islands. Drop far enough and you leave the Aether entirely, reappearing in the Overworld high in the sky and falling toward the ground with full fall damage waiting at the bottom. Treat every ledge as lethal, bridge across gaps, and never fight near an edge unless you have a way to catch yourself.
Sky Respawn Anchor and Hearthstone
The Sky Respawn Anchor is your lifeline. Place it, charge it with Ambrosium Shards, and interact to bind your respawn so death returns you to your base instead of the Overworld. The Hearthstone is the companion item: hold interact to channel a teleport back to the Overworld spawn, the fastest way home when you need to restock.
Totem of Unfalling and Cloud Boots
The Totem of Unfalling saves you from a killer drop, but only while you hold it. When you fall more than ten blocks with solid ground close below, it spawns an Aercloud platform beneath your feet and grants Slow Falling, then is consumed. Cloud Boots are the reusable option, letting you walk directly on Aerclouds to bridge across the sky.


Controlling Time with the Sun Altar
The Sun Altar, a guaranteed reward from the Karthuul fight, lets you bend time in the Aether. Interacting cycles it through permanent day, permanent night, a normal cycle, and a fast-forward mode that speeds the clock up threefold. It is perfect for skipping dangerous nights or rushing crops along.
Aether Ores and Materials
Almost everything you build starts with the Aether’s own ores and drops, which appear inside Holystone, Arkslate, Pagorium, and the other stone types that make up the islands. Learning what each material does tells you what to hoard and what to smelt.
Zanite Gem
Zanite is the Aether’s iron-tier material and the backbone of your early game. Its gems craft a full set of tools, weapons, and armor, and nine gems compress into a Block of Zanite for storage. Zanite is also the currency the Angel Traders deal in, so every gem you mine is either gear or spending money.
Gravitite
Gravitite is the diamond-tier upgrade and the best material you can craft with. You mine Raw Gravitite from ore, refine it into Gravitite Plates, and use those plates for the entire Gravitite gear line, which mines faster and lasts far longer than Zanite. Raw Gravitite is valuable enough that Angel Smiths accept it directly as payment for finished gear.
Ambrosium Shard
Ambrosium is the Aether’s light and energy source. Shards craft into Ambrosium Torches, charge your Sky Respawn Anchor, and revive the Petrified Angels that become your traders. Keep a healthy stock at all times, because Ambrosium touches nearly every survival system in the add-on.
Amber and Zephyr Silk
Amber is the crafting glue behind several tools, forming the core of the Dart Shooter and the Hearthstone, and it repairs the Dart Shooter as it wears. Zephyr Silk, harvested from the flying Zephyr, is a light material used in the Cloud Staff and the Hearthstone. Both are worth collecting early.


Best Weapons in Aether Legends
The Aether offers everything from simple swords to boss-only artifacts that reshape how you fight. The table below ranks the main melee weapons by raw performance, and the sections after it cover the specialty gear worth building for specific situations.
Gravitite Sword
Zanite Sword
Valkyrie Sword
Gravitite Spear
Gravitite Sword
The Gravitite Sword is the strongest craftable weapon, dealing 7 damage with a diamond-tier durability of 1561 that lasts through long expeditions. It crafts from Gravitite Plates and sticks, and because Gravitite gear is enchantable at a high value, it takes strong enchantments well. For most of the mid to late game, this is the weapon you carry by default.
Valkyrie Sword
The Valkyrie Sword is a reward for slaying the Valkyrie Queen rather than sparing her, and it trades a point of base damage for utility. It matches diamond-tier durability, grants a full extra block of reach, and can perform a Lightning Dash that closes distance in an instant. It is the duelist’s choice, ideal for darting in and out of a fight.
Sun Staff and Cloud Staff
The Sun Staff, dropped by Karthuul, charges up and launches a fireball you can steer after it leaves your hand, a devastating ranged option with a huge 3000 durability. The Cloud Staff fires a Zephyr wind blast that shoves enemies away, ideal for creating space or knocking foes off an island. Neither deals melee damage, so keep a sword handy too.

Ancient Shield
The Ancient Shield is a rare drop from the Slider that turns defense into offense. Crouch to charge it up, then release to bash nearby enemies, which pairs well with the tanky Ancient armor set. Its durability is modest at 337, so treat it as a burst tool for tough encounters rather than an everyday blocker.
Dart Shooter and Darts
The Dart Shooter is a rapid-fire ranged weapon crafted from sticks and Amber, and it fires four dart types that trade damage for status effects. Plain Darts are pure projectiles, Poison Darts inflict Poison, Golden Darts apply Glowing to tag targets, and Blight Darts hit with Inebriation. Darts are cheap to mass-produce, especially from the Angel Fletcher, so they soften enemies from afar.


Best Armor Sets
Armor progression in the Aether goes well beyond simple defense numbers, because the top sets each carry a unique perk. Zanite is your reliable starter set at 15 total armor points, but the four endgame sets below are what you build toward, and the right choice depends on how you like to play.
Gravitite
Ancient
Valkyrie
Sun
Gravitite Armor
Gravitite armor is the best all-around set, offering 20 total armor points with strong durability and no drawbacks. It crafts from Gravitite Plates, enchants well, and works for every situation from mining to boss fights. If you only build one endgame set, make it this one.

Ancient Armor
Ancient armor is the heaviest set in the game at 24 total armor points, with an enormous 888 durability on the chestplate alone, crafted from the Ancient Plates the Slider drops. The catch is that each piece reduces your movement speed, so a full set makes you noticeably slower. Wear it when you plan to stand and trade blows.
Valkyrie Armor
Valkyrie armor keeps the lighter 15-point profile of Zanite but layers on the perks a sky world demands. Every piece grants knockback resistance and fall damage reduction, and the set carries the highest enchantability of any armor in the add-on. It is the mobility set, ideal for gliding fights and staying on your feet.
Sun Armor
Sun armor matches Gravitite’s 20 armor points and adds a bundle of fire-themed abilities. The helmet casts an area light, the chestplate reflects flame thorns onto attackers, the leggings grant fire immunity, and the boots let you walk on lava. It is the specialist set for the fiery Aether Desert.
Mounts and Passive Creatures
Crossing the Aether on foot is slow and risky, so the add-on gives you mounts that turn the gaps between islands into part of the fun. Three creatures carry you through the sky, and several others provide food, materials, and the eggs that make mounts possible in the first place.
Taming and Riding a Moa
The Moa is the mount you will use most. Feed a wild Moa Golden Eggs until it is tamed, then place a Saddle on it to ride, using Shears later if you want the saddle back. Sneak to dismount when you land.
Moas come in three feather tiers that set both their health and how many mid-air jumps they can chain, from a double jump up to a quadruple jump. Holding jump lets them glide forward, which is how you cross the widest gaps.
Golden Goose and Golden Eggs
You cannot tame a Moa without Golden Eggs, and those come from the Golden Goose. These skittish birds flee when you approach, so pen a few in before they scatter, and they will periodically lay a Golden Egg on their own. Golden Eggs also heal and breed tamed Moas, so a small goose farm keeps your stable running.
Flying Cow, Sheepuff, and Phyg
The Aether’s livestock float as happily as they graze. Milk a Flying Cow with an empty bucket for a Holy Milk Bucket, a drink that clears only your negative status effects, which is invaluable before a boss fight. Sheepuffs give wool when sheared but lose their Slow Falling until it regrows, and the Phyg is a floating pig that drops pork and feathers.
Sherdal and Swet
The Sherdal is a flying pet you tame with Figs or Grapes. Once tamed it follows you, teleports to keep up, and fights alongside you, healing when you feed it an Ambrosium Shard.
The Swet is a floating slime best treated with caution. It swallows unwary players and drifts off into the sky with them trapped inside, releasing them only on dismount. Killing one yields Swet Droplets, used to grow crops and plants.
Hostile Creatures of the Aether
Beauty aside, the Aether is full of things that want you dead, and they cluster by biome. Knowing what lurks in the forests, the deserts, and the dungeons lets you pack the right gear before you go, and lets you avoid the mobs that punish a careless approach.
Forest Dangers: Aechor Plant, Leshy, and Cockatrice
The Aether Lush Forest hides several ambushers. The stationary Aechor Plant, with 20 health, pelts you with projectiles from far away and summons exploding Aechor Sprouts when you get close. It is worth the trouble, though, since it drops the Aechor Petals you need for pendants and Poison Darts.
The Leshy, at 15 health, comes in melee and dart-throwing variants and flees from golems. The 60-health Cockatrice is nastier, firing bursts of projectiles at range and switching to a heavy melee bash once you close in.
Desert Dangers: Sun Cult, Dust Wraith, and Zephyr
The Aether Desert is the most punishing surface biome. Sun Cult Followers, at 20 health, circle above you alternating melee dives and ranged shots, and both they and the 60-health Sun Warrior explode violently when killed.
The invisible Dust Wraith ambushes with a damaging Sandstorm that pushes you around, while the floating Zephyr snipes you with homing wind gusts. Those gusts can actually be swatted back with a well-timed melee swing.
Both the Sun Cult Follower and the Sun Warrior detonate when they die, and the Sun Warrior’s blast is strong enough to break blocks and start fires. Land the killing blow from range, or back away the instant one is about to fall.
Dungeon Guardians: Sentry, Tile Sentry, and Mimics
Dungeons defend their loot with purpose-built guardians. The Sentry rolls and rams you but takes ten times damage from projectiles, so a bow or Dart Shooter shreds it. The wall-mounted Tile Sentry fires projectile bursts and only takes damage from explosions. Mimics disguise themselves as chests before lunging, in Bronze, Silver, and Golden variants that drop the matching key.
The Giant and the Ancient Soul
Two Aether creatures are more useful understood than fought. The Giant, found sleeping in the Aether Mountains, is neutral until provoked, but its 60 health and 30-damage swing make waking it by accident a real threat.
The Ancient Soul is a passive, hovering spirit you should never attack. Capture it in a Glass Bottle instead, because bottled souls power the artifact system. Mistreating souls draws the invisible Watcher to hunt you.
Dungeons, Keys, and Treasure
The Aether’s dungeons come in three ascending tiers, each locked behind a colored key and each guarding the relics and gear that drive your progression. Understanding how the chests and keys work saves you from both wasted keys and deadly surprises.
Bronze, Silver, and Golden Keys
Treasure Chests come in Bronze, Silver, and Golden versions, and each opens only with its matching key. Keys drop from the Mimics that impersonate chests, and the Angel Cleric trades you up the chain: a Bronze Key plus Zanite Gems becomes a Silver Key, and a Silver Key becomes a Golden Key. Hold on to spares, since the higher tiers hold the best loot.
Real Chests, Imposters, and Mimics
Not every chest is safe. A plain Treasure Chest always holds loot, but an Imposter Chest has roughly a one-in-four chance of turning into a Mimic when unlocked, and a true Mimic Chest is guaranteed to attack. Approach any dungeon chest with your weapon ready, since the difference between a reward and a fight is not always obvious until the lid opens.
Relics and Why They Matter
Ancient Relics are the Aether’s most important loot. They come from dungeon Treasure Chests and from enemies like the Sun Cult and the Sentry, and they serve two roles: they upgrade your artifacts at the Ancient Shrine, and they awaken two of the three bosses. Every relic counts equally, so stockpile them, because both the artifact grind and the boss gauntlet run on them.
The Three Bosses
Aether Legends builds toward three major boss fights, each in its own arena and each with a distinct summoning ritual and reward. The table below ranks them by overall threat, and the sections after break down how to summon, survive, and beat each one.
The Slider
Karthuul
Valkyrie Queen
The Slider
The Slider is the entry boss, a massive sliding block with four eyes that each take eight hits, for 32 in total. You start the fight by interacting with it while holding any Ancient Relic. Only the currently exposed eye can be damaged, so you circle the arena striking whichever eye is open.
It rams you for light contact damage, hurls falling blocks for 8, and summons Tile Sentries to harass you, but it never hits especially hard. Defeat it for a chance at the Ancient Shield and a guaranteed stack of Ancient Plates.
Slider Drops

 Ancient Shield

 Ancient Plate
Karthuul
Karthuul is a 300-health sun tyrant you revive by interacting with it while holding an Ancient Relic. It teleports constantly and attacks only from range, throwing bouncing fireballs for 5 damage and firing volleys of seven homing Sun Missiles that hit for 10 each.
Its most dangerous trick is spawning Sun Crystals that blind you, spawn husks, and heal Karthuul by 2 for every crystal left alive, so destroying them the moment they appear is not optional. Below 20 percent health it enters an enraged phase, so save your strongest healing and burst damage for the finish. Winning grants the Sun Staff and the Sun Altar.
Karthuul Drops

 Sun Staff

 Sun Altar
The Valkyrie Queen
The Valkyrie Queen is the hardest fight, and reaching her takes preparation. You challenge her at the Valkyrie Altar by offering 10 Victory Medals, which you earn by defeating and sparing the Valkyrie Warriors and Archers found in the Silver Dungeon. She cannot be fought on Peaceful difficulty, so set Easy or higher first.
She alternates ground and aerial phases, swiping for 8 damage, slamming a lightning attack for 14 that also sets you on fire, and raining projectile barrages from the air. Her 228 health is less the challenge than her burst damage, so wear Valkyrie or Sun armor and keep your distance during the aerial phase.
Once the Valkyrie Queen is beaten she becomes invulnerable and you choose her fate. Interact to spare her and receive the Valkyrie Horn, which summons Valkyrie warriors to fight for you. Attack her to slay her and claim the Valkyrie Sword instead. You cannot get both from one fight, so choose the reward that fits your playstyle.
The Artifact System
Artifacts are the Aether’s deepest progression system, a set of equippable accessories that grant passive powers without taking up an armor slot. You manage them through the Artifact Bag, which opens a menu with four equip slots, and you strengthen them at the Ancient Shrine using the relics and souls you gather across the world.
The Artifact Bag and Life Shards
The Artifact Bag gives you four equip slots: one for a Cloak or Valkyrie Wings, one for a Pendant, one for Gloves, and one for a Life Shard. Life Shards are the standout, raising your maximum health from the base 20 up to 40, one heart at a time across their ten tiers. A fully upgraded Life Shard alone doubles your survivability.
Upgrading at the Ancient Shrine
To upgrade an artifact, craft and place an Ancient Shrine, set your artifact on it, and feed it Ancient Relics while Ancient Souls hover within a few blocks. Without nearby souls the shrine will not work, so keep captured souls around it. Most artifacts cost 8 relics for tier two and 16 for tier three, while Life Shards climb through ten cheaper steps.


The Giant and Hearthbound Gear
Because equipped artifacts and gear drop on death, the Giant offers a way to protect them. Feed a sleeping Giant a full stack of a material it wants, such as 24 Iron Ingots or a Netherite Ingot, and it turns friendly. Then hand it any tool, weapon, armor piece, or artifact, and it returns the item Hearthbound and repaired, so you keep it when you die.
Angel Traders and the Zanite Economy
Trading is a pillar of Aether Legends, and it runs on Angels rather than Villagers. You start the economy by reviving the Petrified Angel statues scattered around the Aether, using an Ambrosium Shard on one to bring it to life as a trader. Every Angel deals in Zanite Gems, so mining Zanite quietly funds the entire trade network.
The Angel Trader and Currency
The base Angel Trader buys raw materials from you and pays in Zanite Gems, and the higher tiers accept increasingly rare items. A single Diamond fetches a handful of gems, while endgame materials like Nether Stars and Netherite Ingots pay out dozens each. This is the fastest way to convert Overworld loot into Aether spending money.
Angel Trader (Currency)

 Raw Beef
 Zanite Gem

 Raw Iron Zanite Gem

 Diamond Zanite Gem

 Nether Star Zanite Gem

 Netherite Ingot Zanite Gem
Angel Smiths
The Tool Smith, Weapon Smith, and Armorer let you skip crafting by converting vanilla gear into Aether equipment. Hand over an iron tool, sword, or armor piece with some Zanite Gems and you get the Zanite version back; swap the gems for Raw Gravitite and you get the far stronger Gravitite version. Their higher tiers even return the gear pre-enchanted.
Angel Smiths (Gear Upgrades)

 Iron Sword Zanite Gem
 Zanite Sword
 Iron Axe Zanite Gem

 Zanite Axe Iron Sword

 Raw Gravitite
 Gravitite Sword

 Iron Pickaxe Zanite Gem

 Zanite Pickaxe Iron Pickaxe Raw Gravitite

 Gravitite Pickaxe
Angel Cleric: Keys and Souls
The Angel Cleric is the most valuable trader for progression. At the expert tier it upgrades your dungeon keys, turning a Bronze Key into a Silver Key and a Silver Key into a Golden Key for Zanite Gems, which saves you from grinding Mimics for the rarer keys. At master tier it sells Bottled Ancient Souls to fuel the Ancient Shrine.
Angel Cleric (Keys and Souls)

 Bronze Key Zanite Gem

 Silver Key Silver Key Zanite Gem

 Golden Key Zanite Gem

 Bottled Ancient Soul Zanite Gem Bottled Ancient Soul
Other Angels Worth Visiting
The remaining Angels round out your needs. The Cartographer sells the Guidebook, the Sky Anchor, and the Amber Case, while the Fletcher mass-produces darts and the Dart Shooter. The Librarian and Cleric build and upgrade your pendants, gloves, cloaks, and Valkyrie Wings, the Farmer and Butcher handle Aether food, and the Stone Mason converts vanilla stone into Aether building blocks.
Angel Cartographer (Utility)

 Paper

 Compass

 Aether Guide Book Compass
 Sky Respawn Anchor Raw Gravitite

 Amber Case
Tips for Success
Set your respawn before you explore. The single most important thing you can do in the Aether is craft, place, and charge a Sky Respawn Anchor at your base. Dying without one sends you all the way back to the Overworld, often far from your portal, so lock in your respawn point before you wander off.
Never fight near an edge. Knockback is deadly here because there is no floor to catch you. Position yourself so that being shoved sends you into a wall rather than off a cliff, and carry a Totem of Unfalling or wear Cloud Boots when you head into open terrain or a boss arena.
Make your best gear Hearthbound. Once you invest in Gravitite gear or upgraded artifacts, take them to a Giant and have them bound so they survive death. Losing a fully upgraded Life Shard or an enchanted Gravitite set to a single unlucky fall stings far more than the cost of befriending a Giant.
Farm Victory Medals before challenging the Queen. The Valkyrie Queen demands 10 Victory Medals, and those only come from sparing Valkyries in the Silver Dungeon. Bank the full ten first, then bring Sun or Valkyrie armor and a ranged option, because her lightning slam and aerial barrages punish anyone caught flat-footed.
Respect the Sun enemies. The Aether Desert is where many runs end, thanks to Sun Cult Followers and Sun Warriors that explode on death. Fight them from range whenever possible, keep fire resistance handy, and remember that Sun armor’s fire immunity turns the whole biome from a death trap into a farming ground.
Frequently Asked Questions
Build a portal frame out of Glowstone in the same rectangular shape as a Nether portal, then use a Water Bucket on the inside to activate it. Once the frame is complete the portal opens and pulls you into the Aether. Naturally generated portals also appear scattered around the Overworld if you prefer to find one.
Falling far enough drops you out of the Aether entirely. You reappear high in the Overworld sky and fall toward the ground with fall damage waiting at the bottom. Guard against this with a Totem of Unfalling, Cloud Boots, or a charged Sky Respawn Anchor, and use the Hearthstone to teleport home safely.
Feed a wild Moa Golden Eggs until it is tamed, then place a Saddle on it to ride. Golden Eggs come from the Golden Goose, which lays them over time. Once mounted, a Moa can chain double, triple, or quadruple mid-air jumps depending on its feather tier, and holding jump lets it glide across gaps.
Angel Traders deal in Zanite Gems, the same gems you mine for early gear. You create traders by using an Ambrosium Shard on the Petrified Angel statues found around the Aether. The base Angel buys raw materials for gems, while specialist Angels sell gear, dungeon keys, artifacts, food, and Bottled Ancient Souls.
You start the Slider by interacting with it while holding an Ancient Relic, and you revive Karthuul the same way with a relic. The Valkyrie Queen instead requires offering 10 Victory Medals at the Valkyrie Altar, and those medals come from sparing Valkyries in the Silver Dungeon. She cannot be challenged on Peaceful difficulty.
Find a Giant in the Aether Mountains and feed it a full stack of a material it wants, such as 24 Iron Ingots or 4 Diamonds, to make it friendly. Then hand it any tool, weapon, armor piece, or artifact, and it returns the item Hearthbound, so you keep it on death. The Giant also repairs the item while it works.